
The Cheat Sheet Every B2 Candidate Should Print
Refinishing defects account for about 26% of the ASE B2 (Solving Paint Application Problems at 15% plus Finish Defects, Causes, and Cures at 11%). That's 14 of the 55 scored questions, roughly a quarter of your score, and it is the largest block of pure diagnostic content on the test.
If you can identify every common defect by description, name its primary cause, and prescribe the correct cure, you've solved the dominant pattern of failure for ASE B2 test takers.
This article is the cheat sheet. Print it. Build flashcards from it. Drill it until you can recite the cause and cure of every defect in under 5 seconds.
How the ASE B2 Tests Defects
The test pattern is consistent. The exam describes a symptom, then asks one of three questions:
- What is the most likely cause?
- What is the correct cure?
- Which technique would prevent this defect on the next job?
Sometimes the question uses Technician A / Technician B framing: one tech identifies a cause, another identifies a cure, and you pick whether one or both are correct.
The diagnostic shortcut: every application defect comes back to one of four variables. Air, paint, gun, painter. If you can name which variable is off, you can pick the right answer.
Application Defects (Showing Up During or Just After Spraying)
These are defects that appear during the spraying process or within minutes of spraying.
Fisheyes
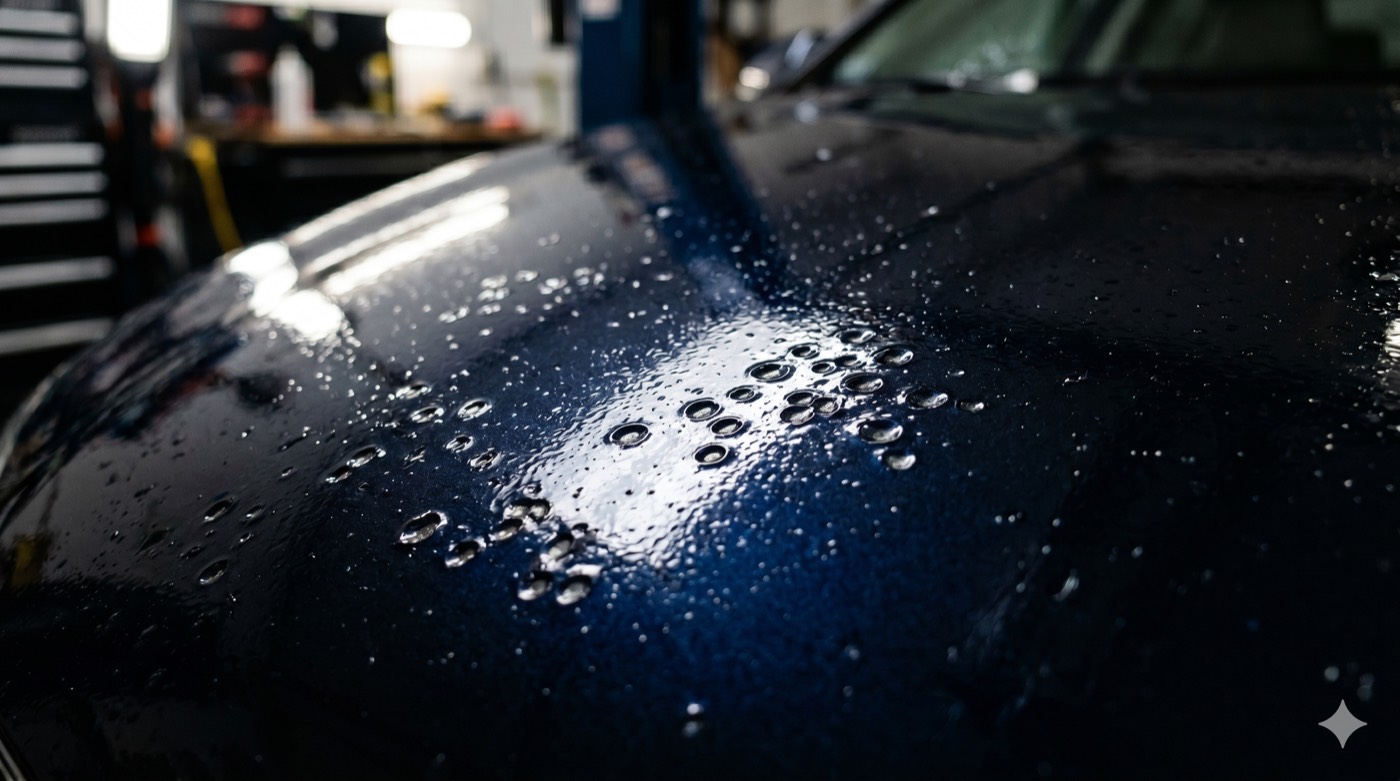
Appearance: Circular craters in the wet paint film, often grouped in clusters. Looks like the paint refused to lay down in those spots.
Cause: Silicone contamination. Could be on the substrate (tire dressing, hand lotion, even some shop sealants migrated to the surface) or in the air supply (oil contamination from compressor, contaminated air hose).
Cure:
- Identify and remove the silicone source.
- Clean the substrate with the manufacturer-recommended wax-and-grease remover.
- Check air supply filters and water separator.
- If the contamination is in the air supply, the entire air line needs decontamination, not just a new filter.
Trap pattern: The exam offers "add fisheye eliminator to the clear" as a tempting answer. Wrong. Fisheye eliminator is a band-aid that masks the symptom; the silicone source still needs to be found and removed. The textbook answer is always identify and eliminate the silicone source.
Orange Peel
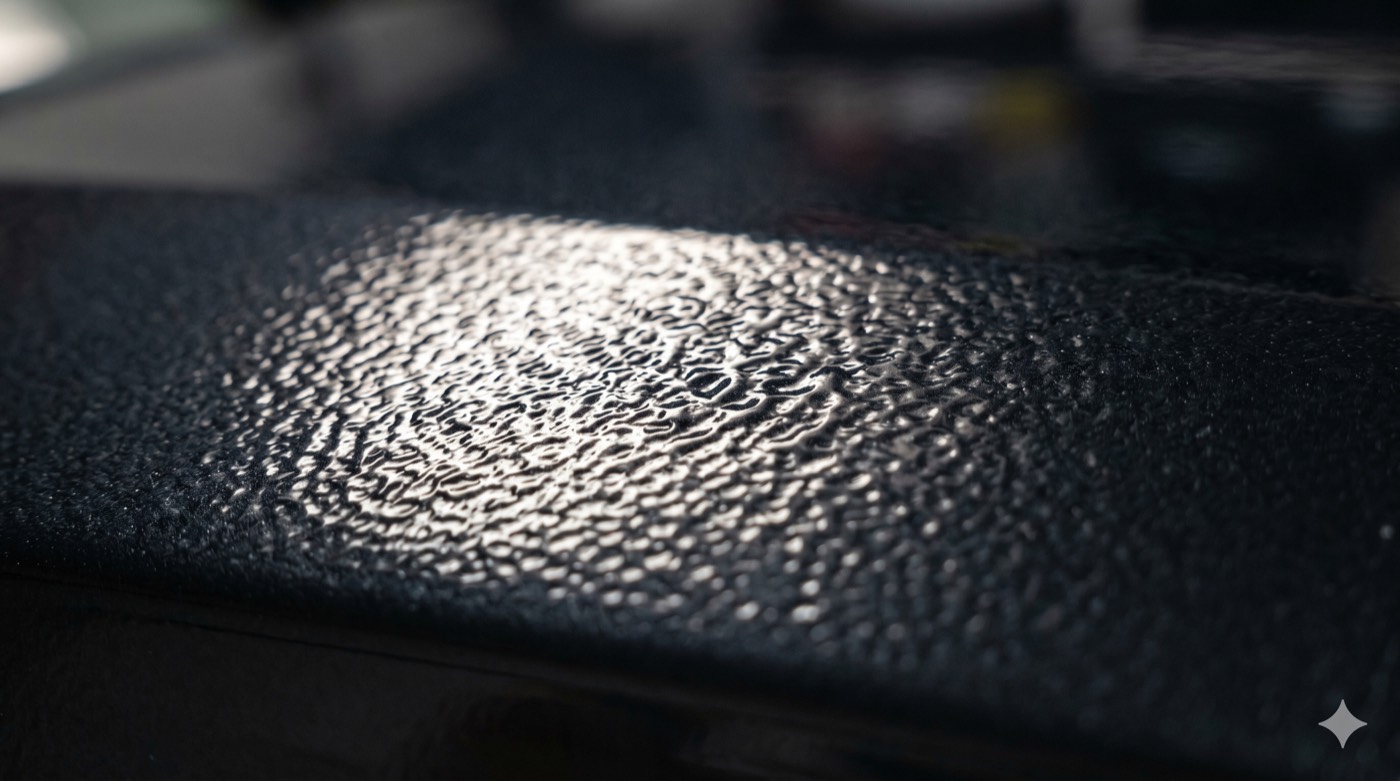
Appearance: Texture in the dried paint film resembling the surface of an orange. The clear coat doesn't lay smooth and flat.
Cause:
- Atomization issue: air pressure too low, fluid tip too large, viscosity too high.
- Flow-out issue: reducer too fast for booth temp, booth too cold, recoat applied before previous coat flowed out.
Cure:
- Adjust the variable that's off. Increase air pressure, switch to smaller fluid tip, slow the reducer, raise booth temperature, or extend flash time.
- For existing orange peel: wet sand and polish if minor; respray if severe.
Trap pattern: A scenario describes orange peel and the exam asks the most likely cause. If the question mentions cold booth or fast reducer, that's the cause. If it mentions low air pressure or wrong tip, that's the cause. Match the symptom to the air/paint/gun/painter variable described in the scenario.
Mottling (Tiger Striping)
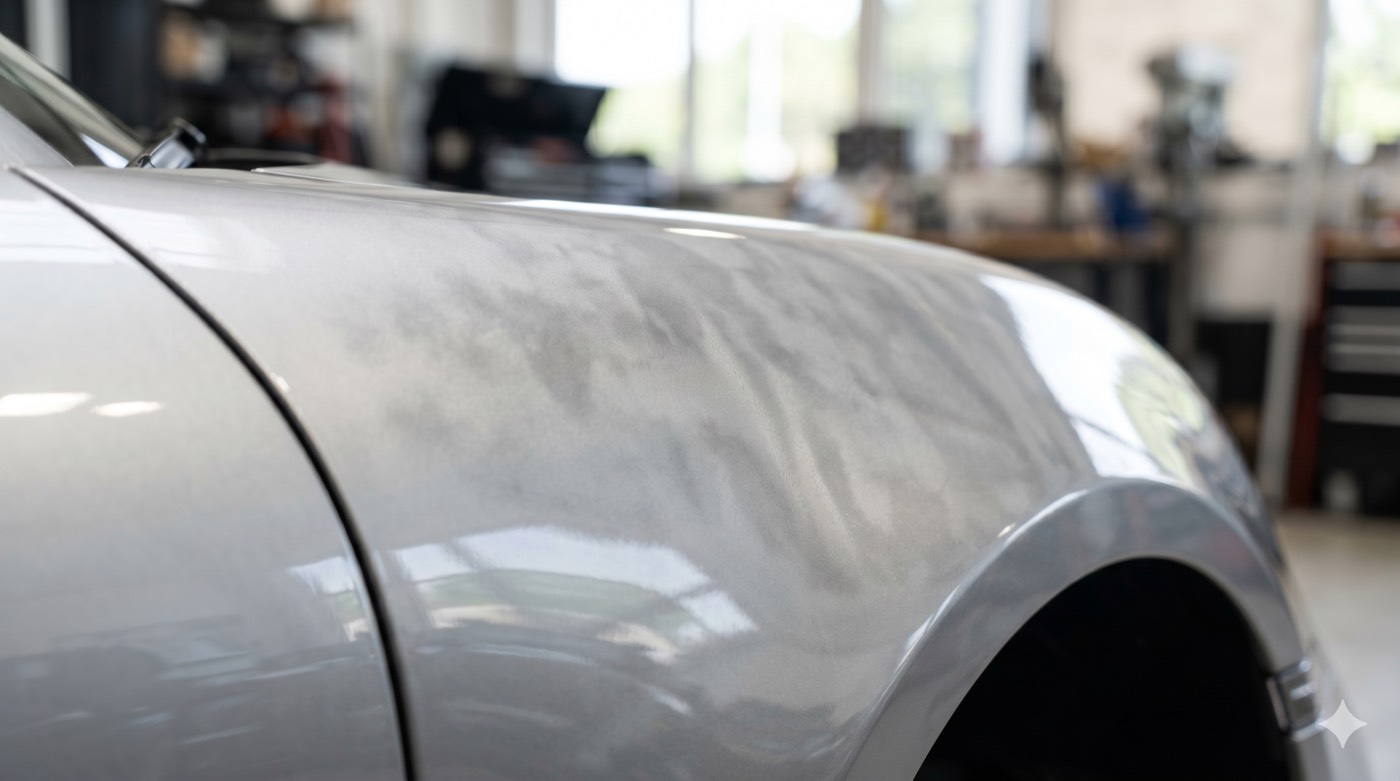
Appearance: Metallic flakes laying unevenly in the basecoat, creating dark and light stripes or patches in the dried color.
Cause:
- Flash time too short between coats (flakes haven't settled).
- Gun distance too close (paint stays wet, flakes swim).
- Wrong overlap (uneven flake distribution).
- Reducer too slow for booth temperature.
Cure:
- Apply a controlled control coat (lightly mist coat at slightly higher distance to orient flakes uniformly).
- Allow full flash between coats.
- Use 75% overlap on metallics, not 50%.
- Match reducer to booth temperature.
Trap pattern: A scenario describes a tech "speeding up the job" with shorter flash times on metallic basecoat. Wrong every time on the test. Allow full flash.
Dry Spray
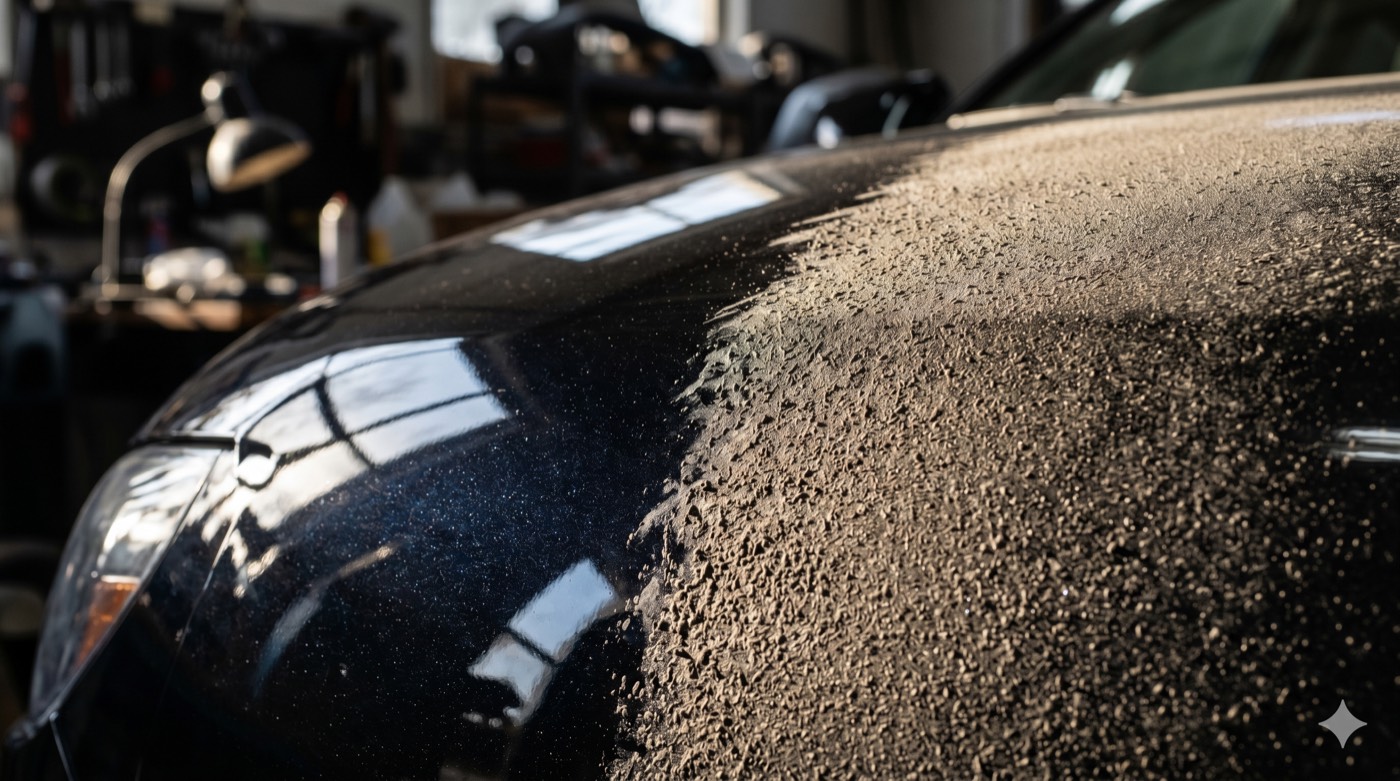
Appearance: Powdery, dusty surface texture. Paint particles dried before reaching the panel and stuck loosely without leveling.
Cause:
- Gun too far from panel.
- Air pressure too high.
- Reducer too fast for booth temp.
- Ambient temperature too high.
Cure:
- Reduce gun distance to 6 to 8 inches.
- Lower air pressure to within manufacturer specification.
- Switch to slower reducer.
Trap pattern: Dry spray often gets confused with orange peel because both have texture. Dry spray has a powdery, loose particle character; orange peel is more uniformly textured but flowed-out. The cause description tells you which one.
Runs and Sags
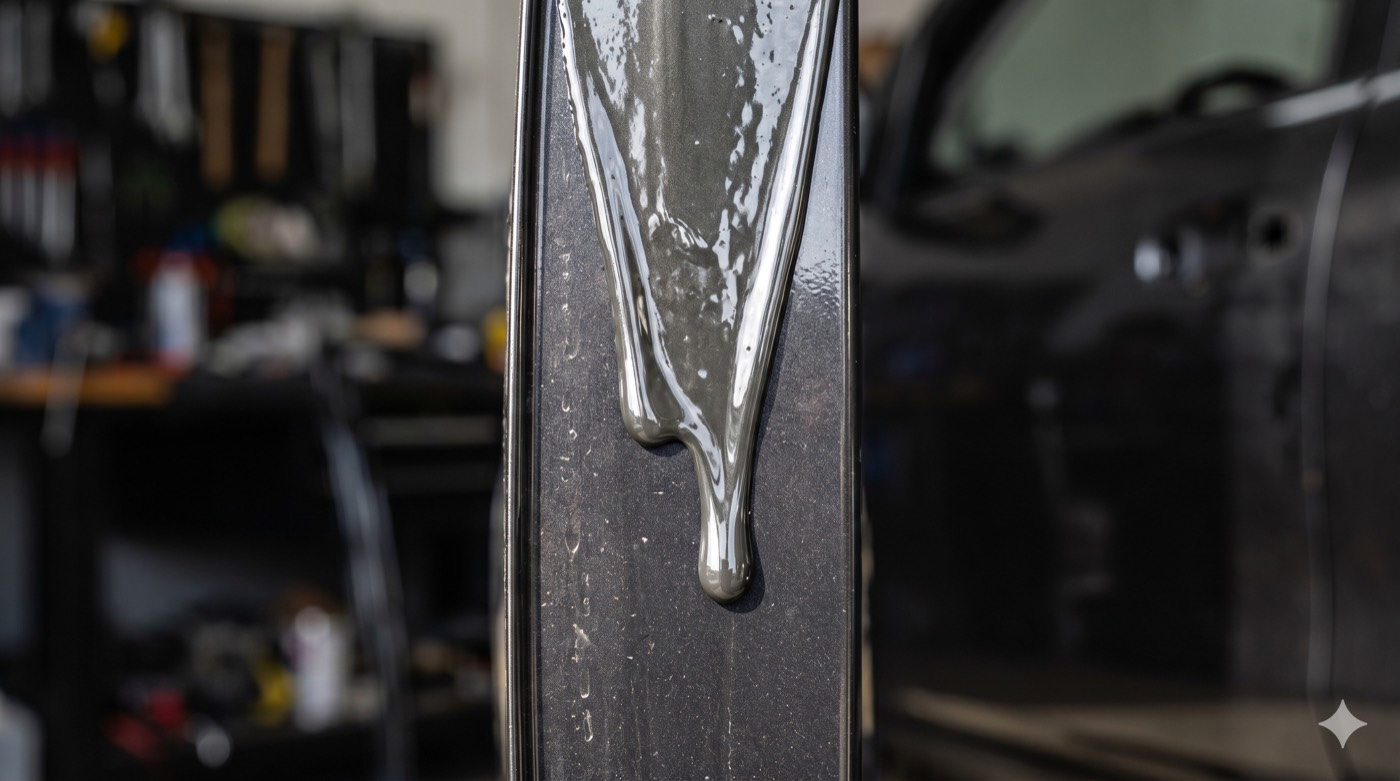
Appearance: Vertical streaks where wet paint flowed down the panel, leaving heavier deposits at the lower edge of the run.
Cause:
- Too much paint applied at once.
- Gun too close to panel.
- Travel speed too slow.
- Too much overlap.
- Reducer too slow.
Cure:
- Apply correct film build per the TDS. Don't double-coat without flash between.
- Maintain 6 to 8 inch distance.
- Increase travel speed.
- Standard 50% overlap (75% for metallics only).
Trap pattern: Once the run is in the dried film, it has to be sanded flat and respraying is often the only restoration. The exam may ask "how to fix" but more often asks "what caused it" and "how to prevent next time."
Solvent Pop (Wet Stage)
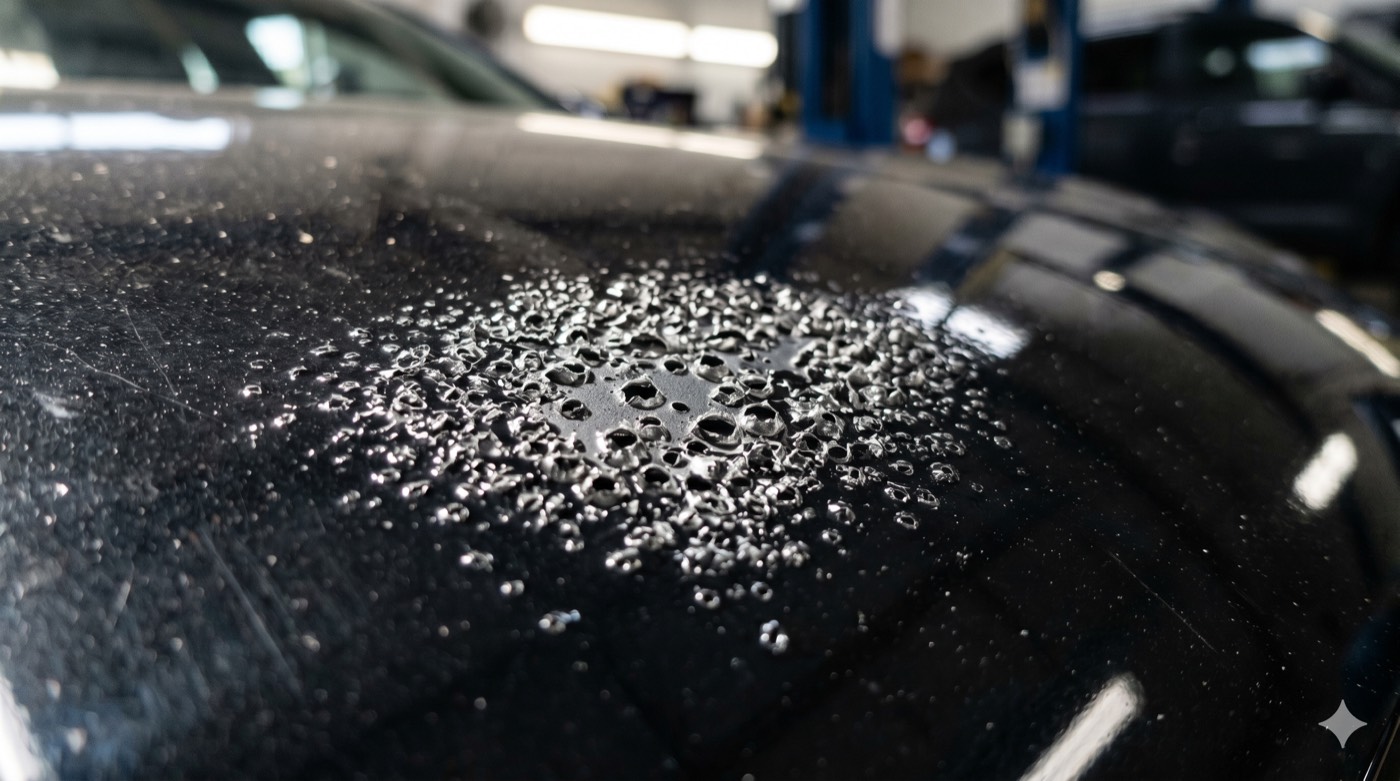
Appearance: Small craters or bubbles in the wet film, looking like tiny holes that opened up as the paint dried.
Cause: Trapped solvents boiled out of the film as the surface dried but the deeper layer was still releasing solvent.
- Insufficient flash time between coats.
- Force-drying too soon after final coat.
- Reducer too fast for booth temp (skin dries before underneath releases solvent).
Cure:
- Allow longer flash between coats.
- Switch to slower reducer.
- Allow full air-dry before force-dry.
Trap pattern: Solvent pop in the wet stage often gets confused with fisheyes. Solvent pop comes from underneath as solvent boils out; fisheyes come from above as the wet paint avoids a contaminant.
Post-Cure Defects (Showing Up After the Paint Has Dried or Cured)
These defects appear hours, days, or weeks after the job is done.
Die-Back
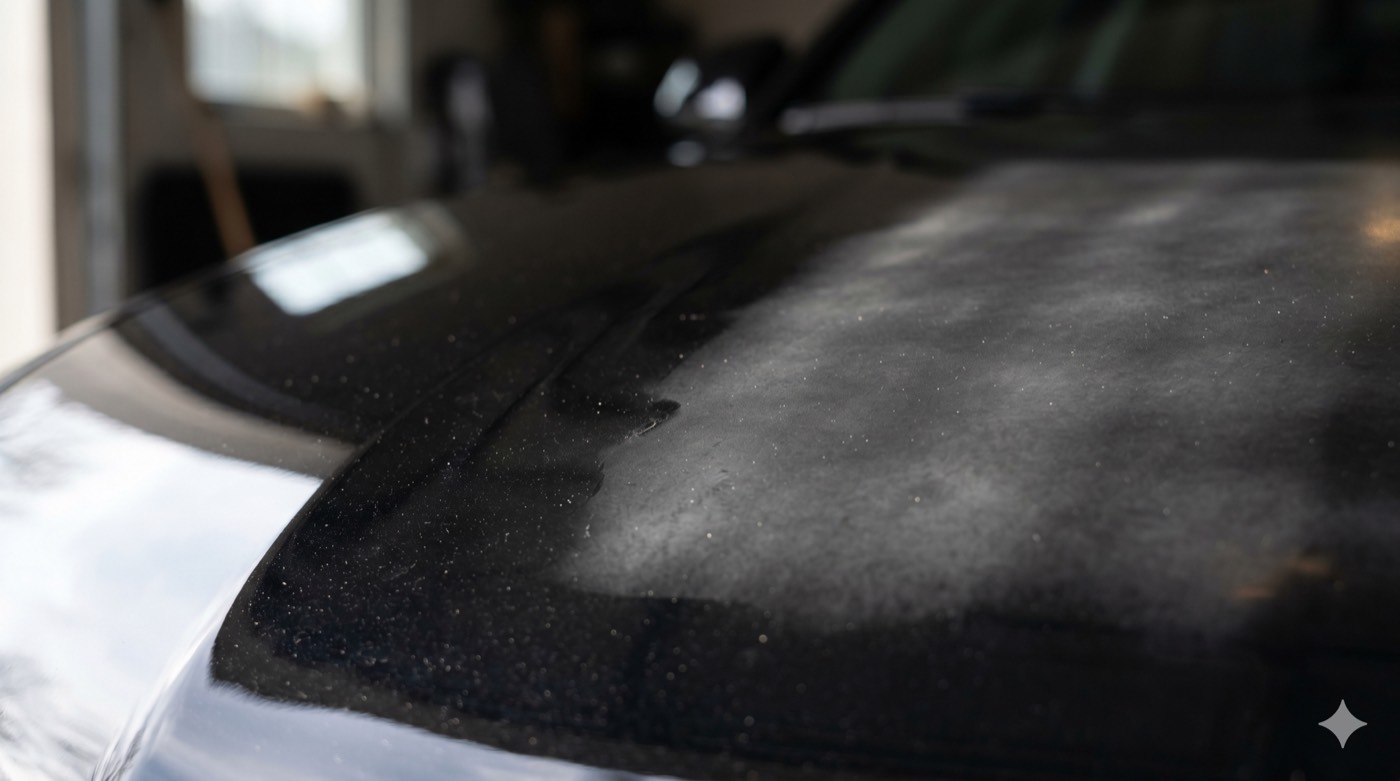
Appearance: Gradual loss of gloss over time. The panel looked great when delivered; the customer comes back complaining the shine has dulled.
Cause:
- Improper hardener ratio (under-catalyzed clear).
- Insufficient cure (force-dry too short).
- Contamination at the time of spraying.
- Solvent trapped in the film, slow-releasing.
Cure:
- Compound and polish for minor die-back.
- Wet-sand and respray for severe cases.
- Identify the original cause (under-catalyzation, contamination, insufficient cure) and correct on next job.
Solvent Pop (Post-Cure)
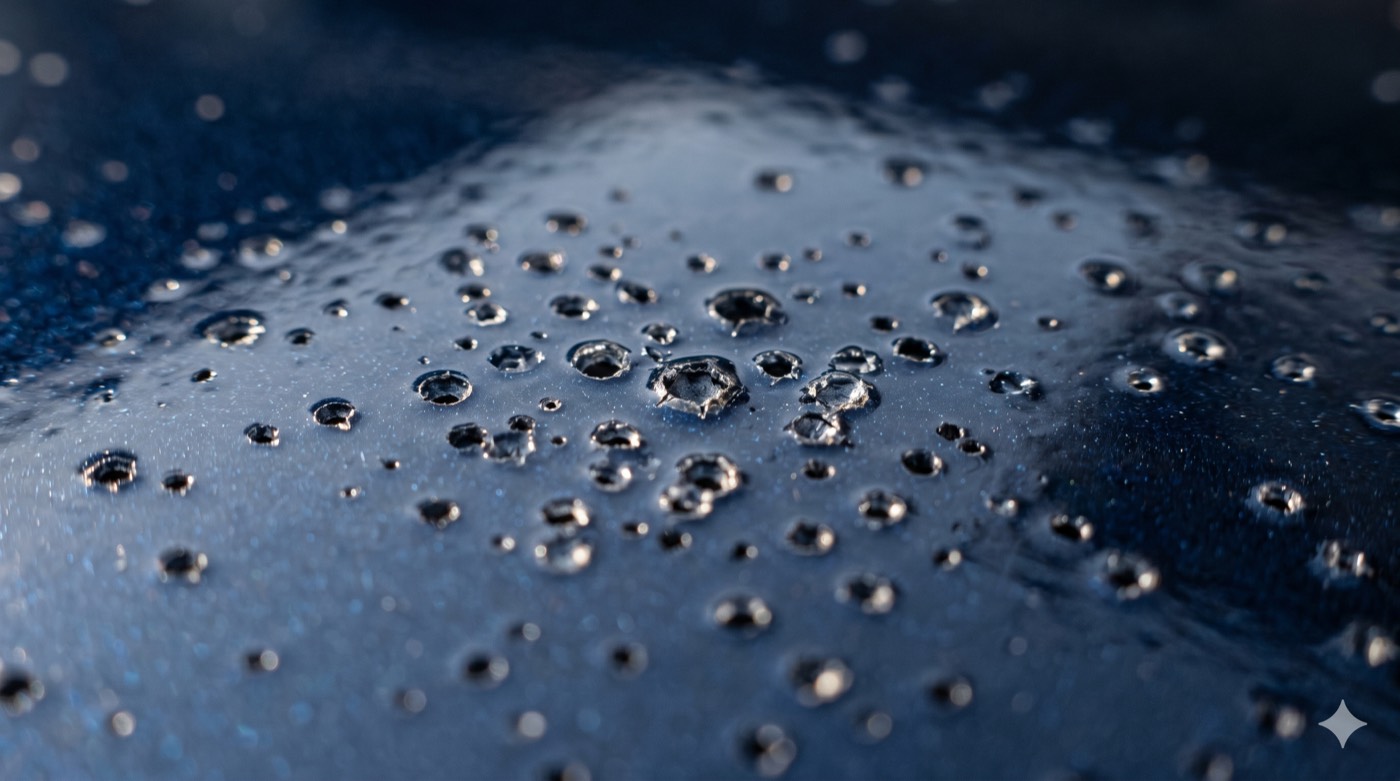
Same root cause as wet-stage solvent pop, but the bubbles or craters appear after the paint has cured.
Cause: Trapped solvent boiled out during the cure cycle.
Cure: Sand flat and respray.
Cracking and Checking
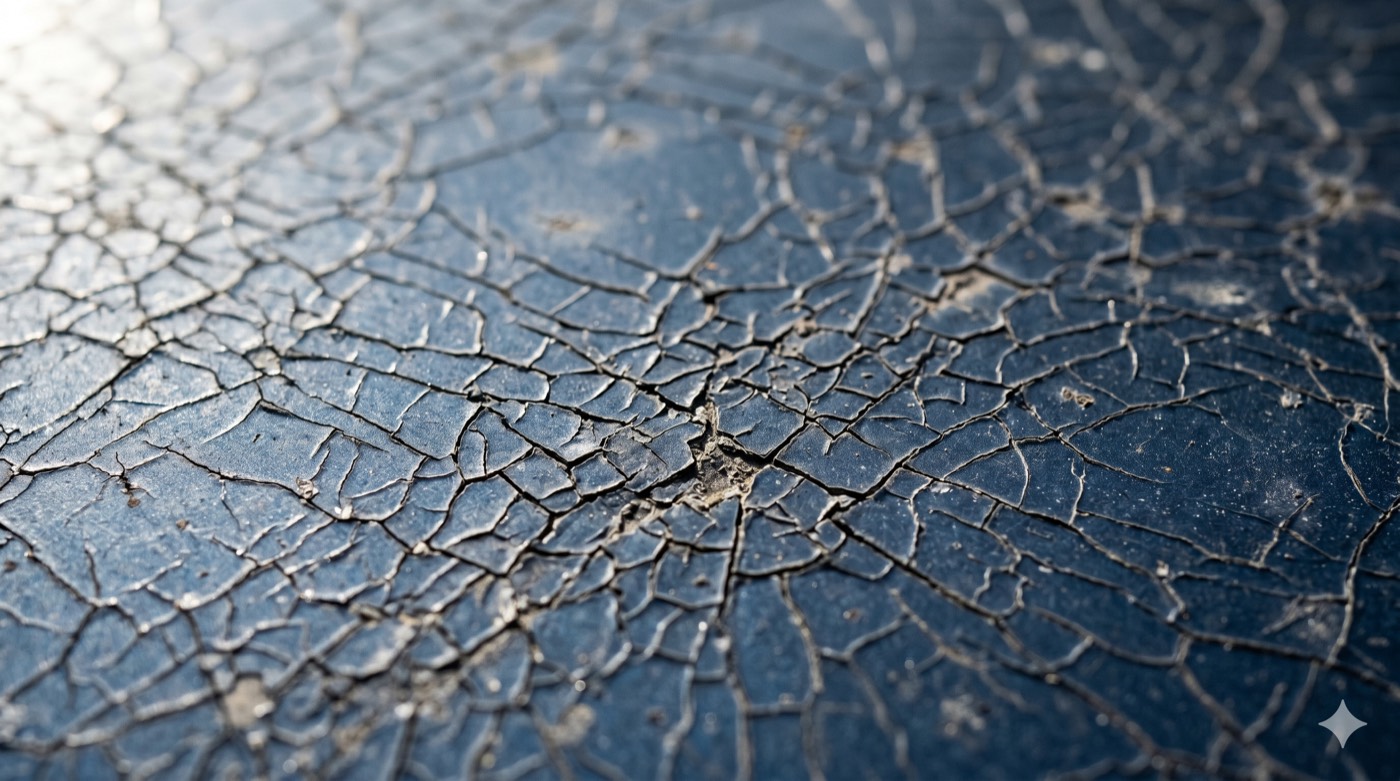
Appearance: Fine cracks visible in the clear or basecoat, sometimes appearing as a network of micro-fractures across the panel.
Cause:
- Film too thick (too many coats or too much material per coat).
- Incompatible products stacked (basecoat from one system, clear from another).
- Flexible part painted without flex additive in clear.
- Insufficient cure before exposure to UV.
Cure: Strip the affected area and respray with proper film build and product compatibility.
Wrinkling and Lifting
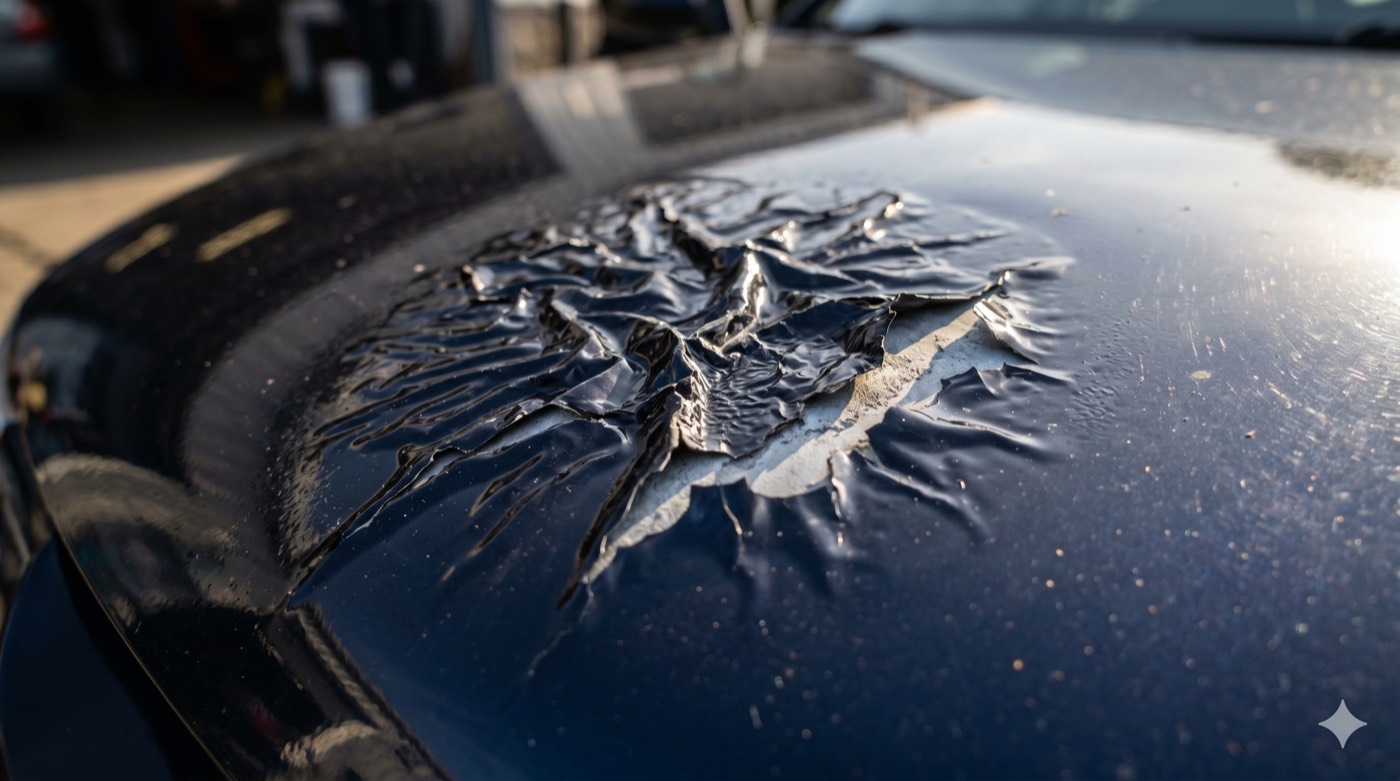
Appearance: The dried paint film wrinkled or lifted from the substrate, often in patches.
Cause: Solvent in the new coat attacked the previous coat.
- Recoating outside the manufacturer-specified recoat window.
- Incompatible products (e.g., enamel over lacquer).
- Insufficient cure of the substrate coat before applying the new coat.
Cure: Strip back to a sound substrate, prime, and respray with compatible products. There's no shortcut.
Adhesion Failure (Peeling)
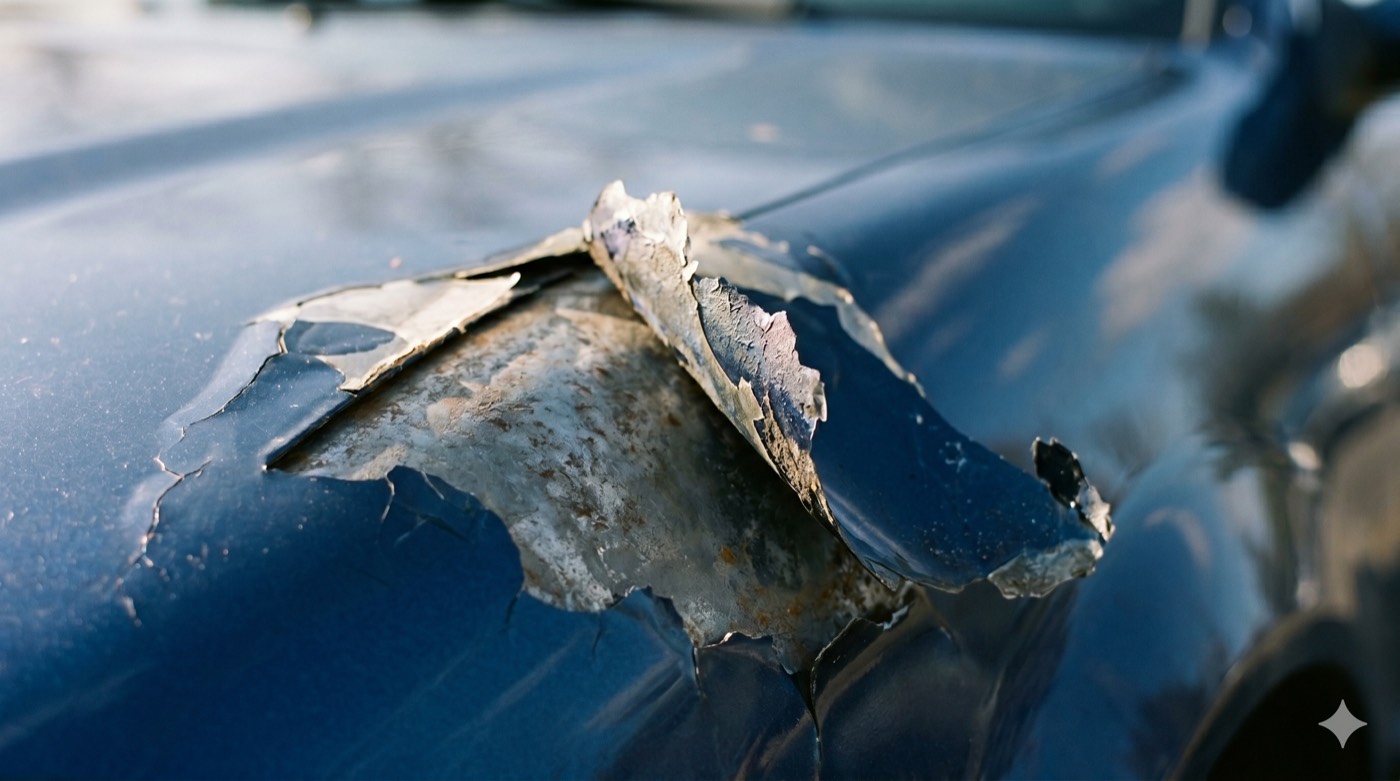
Appearance: Paint peeling from the substrate, sometimes in large flakes that can be lifted by hand.
Cause:
- Insufficient surface preparation (wrong grit, missed sanding step).
- Contamination on the substrate (silicone, wax, oil).
- Wrong primer for the substrate.
- No adhesion promoter on polyolefin plastic.
- Bare metal not primed before sealer.
Cure: Strip back to a sound substrate, properly prep, prime correctly, respray.
Blushing
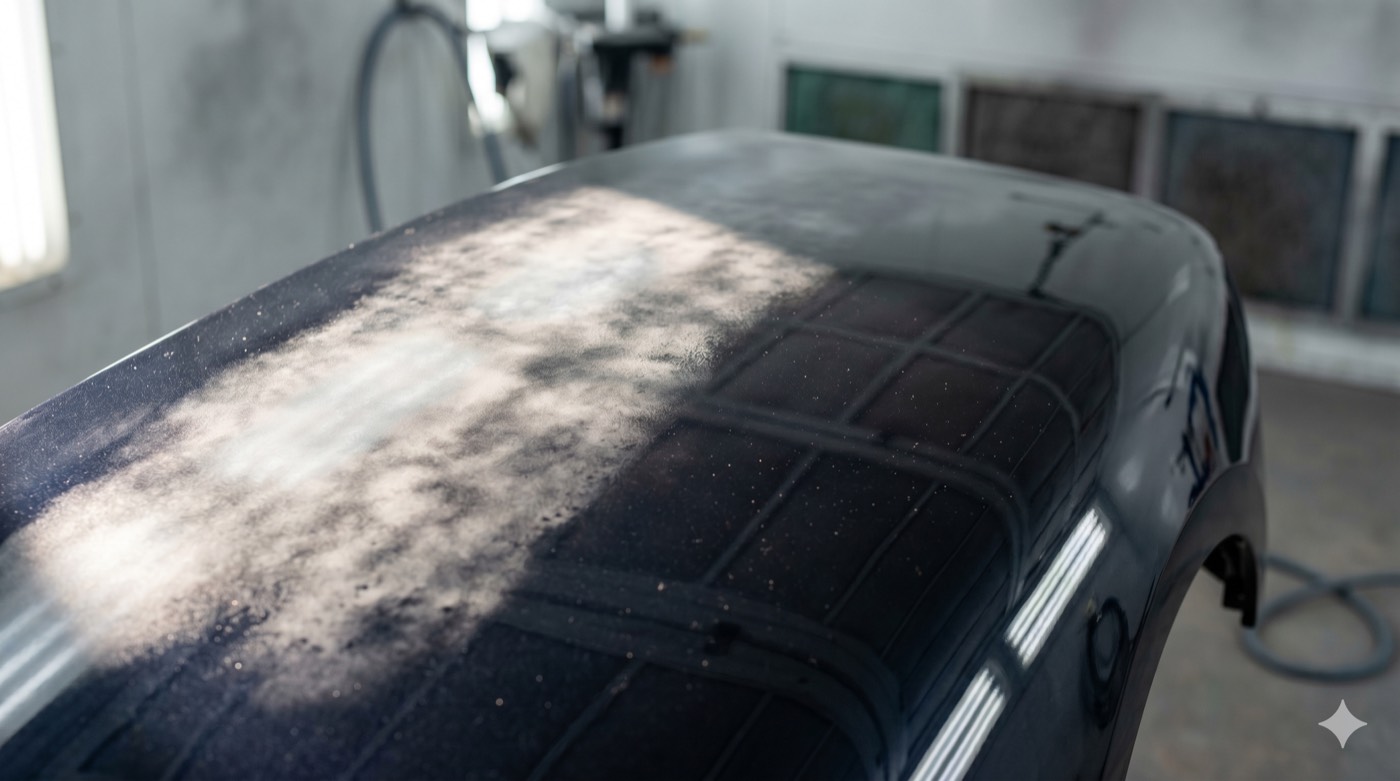
Appearance: Milky, hazy clear coat. Often appears on humid days.
Cause: Moisture trapped in the lacquer-type finish during drying. Solvent evaporates and pulls moisture out of the air into the film.
Cure:
- Use slower reducer or retarder additive.
- Control booth humidity.
- For existing blush: compound and polish to remove the haze, or respray.
Bleeding (Color Stain Through New Color)
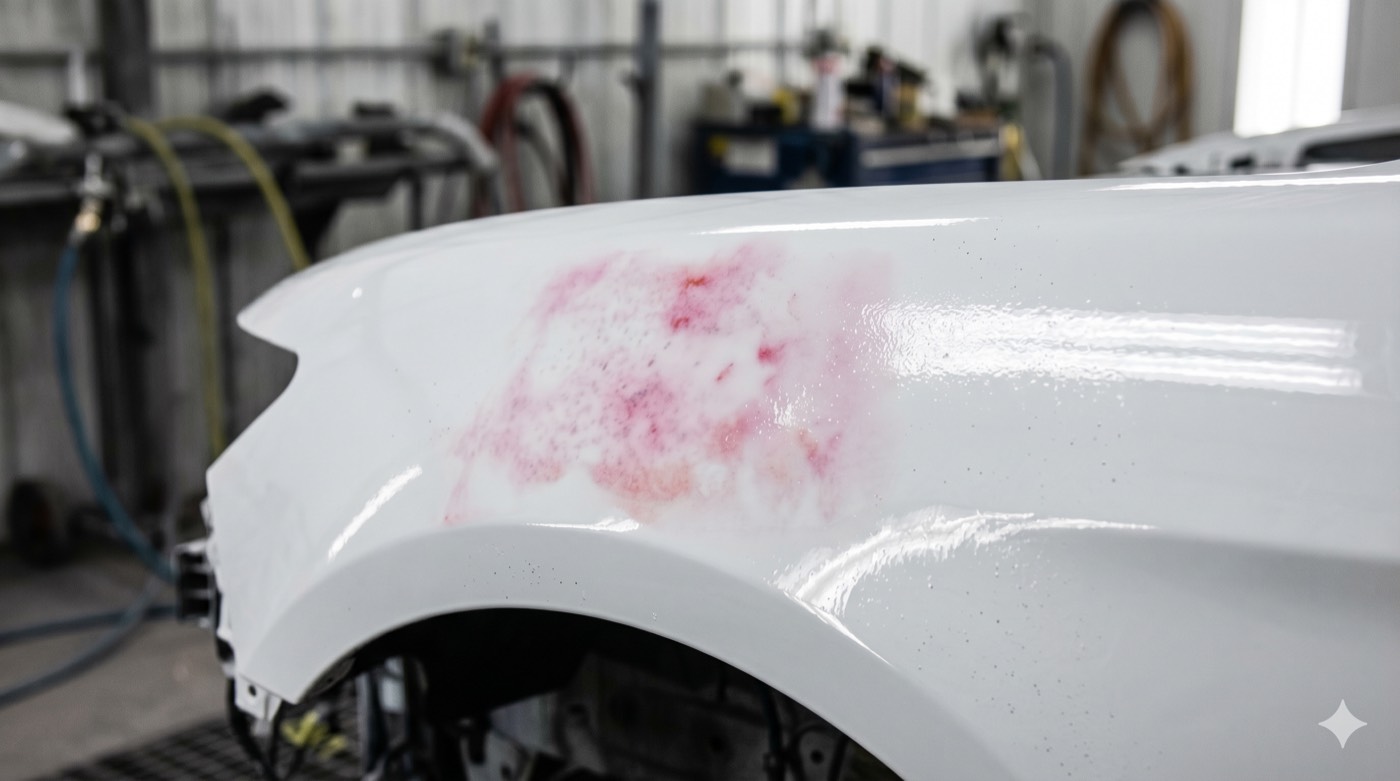
Appearance: Old color showing through new color, often as a faint pink or red tint.
Cause: Solvent in the new color dissolved pigment from the old substrate (often a dark or red base) and pulled it into the new film.
Cure: Apply a bleed-blocking sealer between the substrate and the new color. Some pigments (red, certain golds) are especially prone to bleeding.
Dirt Nibs and Fisheye Craters
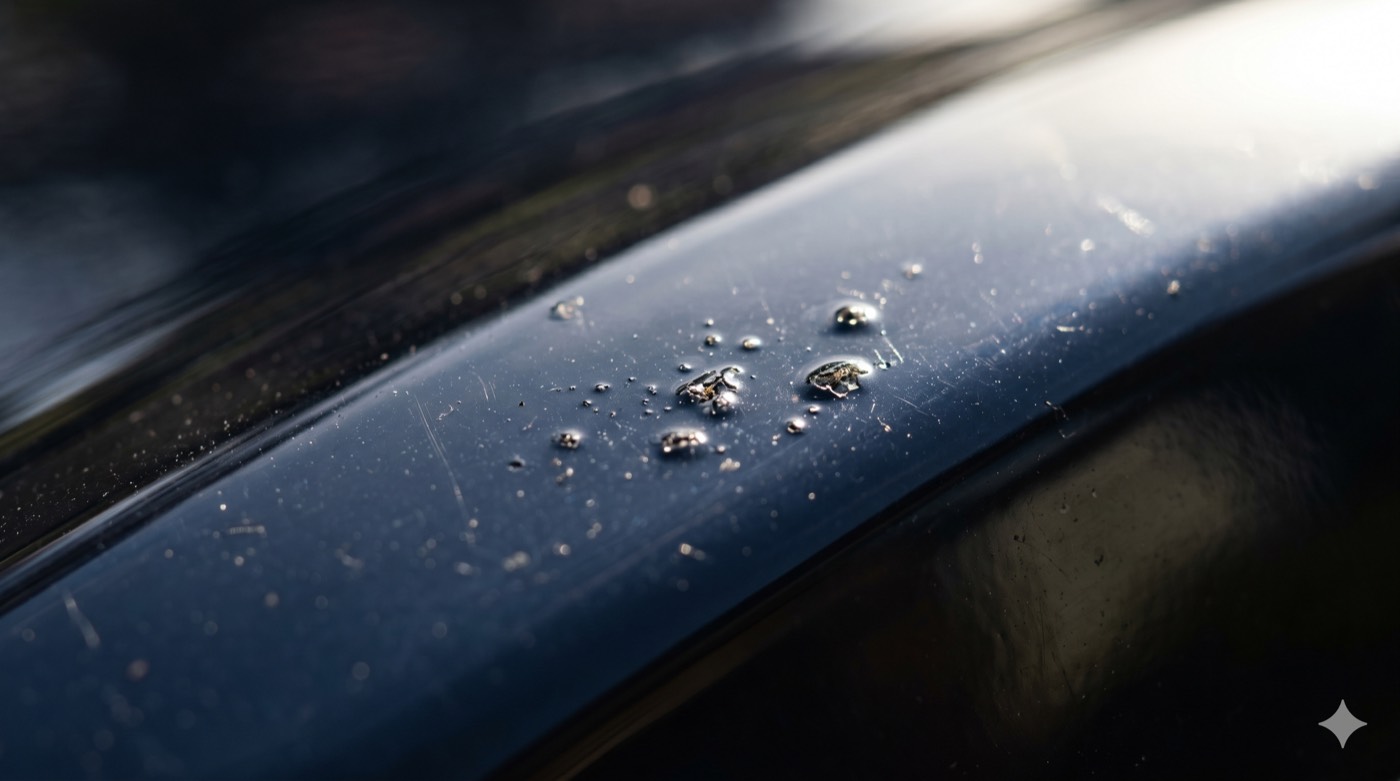
Appearance: Small bumps (nibs) from dust contamination or small craters (after polishing fisheyes).
Cure: Nib file, sand, and polish if minor. Respray if extensive.
The Cause-and-Cure Quick Reference
The dominant test territory in one table.
| ❌ Defect (Symptom) | ✅ Primary Cause and Cure |
|---|---|
| Fisheyes | Silicone contamination. Clean and eliminate source. |
| Orange peel | Atomization or flow-out. Adjust air pressure, tip, reducer, or flash. |
| Mottling | Flash time, distance, or overlap on metallics. Use 75% overlap and proper flash. |
| Dry spray | Gun too far, pressure too high, reducer too fast. |
| Runs and sags | Too much material, too close, too slow. Correct technique. |
| Solvent pop | Insufficient flash. Force-dry too soon. Use slower reducer, longer flash. |
| Die-back | Under-catalyzed clear or insufficient cure. Mix to TDS, allow full cure. |
| Cracking and checking | Film too thick or incompatible products. Strip and respray correctly. |
| Wrinkling and lifting | Solvent attacking previous coat. Honor recoat window. Use compatible products. |
| Adhesion failure | Bad prep or wrong primer. Strip, prep, prime correctly. |
| Blushing | Moisture in lacquer film. Slow reducer or retarder. |
| Bleeding | Pigment from substrate dissolving into new color. Use bleed-blocking sealer. |
How to Use This Cheat Sheet
The most effective study technique with this material:
- Build a flashcard deck. Front: defect name. Back: cause AND cure.
- Run the deck both directions until you can recite each pairing in under 5 seconds.
- Drill 30-question ASE B2 simulator sets in the Application Problems and Finish Defects categories every other day for 2 weeks before the test.
- For every miss on the simulator, write down the rule. "I missed this because I confused dry spray with orange peel. The difference is dry spray has loose particles; orange peel has flowed-out texture."
- Re-read the cheat sheet weekly in the 4 weeks before your test. Repetition locks the pairings into long-term memory.
Where to Start This Week
If defect identification is your weakest ASE B2 category, focus the next 14 days on this material exclusively. Build the flashcard deck today. Drill the categories on the simulator daily. Score above 85% on Application Problems and Finish Defects before you schedule the real test.
The ASE B2 rewards painters who can match symptoms to root causes. This cheat sheet is the matching guide.
The Diagnostic Mindset
Beyond memorizing pairings, the ASE B2 rewards a diagnostic mindset. When a question describes a defect, walk through this mental checklist:
- What did the defect look like? Powdery, glossy, textured, peeled, cracked, hazy. The visual descriptor narrows the candidates.
- When did it appear? During spraying, immediately after, hours later, days later. Timing narrows further.
- Which of the four variables is implicated? Air supply, paint chemistry, gun setup, painter technique.
- What's the test-correct cause? The textbook root, not the shop band-aid.
- What's the test-correct cure? The procedure-aligned fix.
This mental flow takes 5 seconds with practice and matches the question to the answer reliably.
How Defects Cluster by Content Area
The ASE B2 splits defect content across two content areas: Application Problems (during/just after spraying) and Finish Defects (post-cure). The pattern below shows which defects belong in which category.
Application Problems content area:
- Fisheyes, orange peel, mottling, dry spray, runs and sags, wet-stage solvent pop, color match drift mid-spray.
Finish Defects content area:
- Post-cure solvent pop, die-back, cracking and checking, wrinkling and lifting, adhesion failure, blushing, bleeding, dirt nibs, fisheye craters (post-polishing).
Some defects (solvent pop especially) span both areas because they can manifest during spraying or after cure. The test typically clarifies which context applies.
Booth Conditions and Defect Probability
Many defects correlate strongly with booth conditions. The ASE B2 expects you to know which conditions favor which defects.
- Cold booth (below 65°F). Slow flash, solvent retention, orange peel, sags from too-slow flow.
- Hot booth (above 80°F). Dry spray, mottling, fast flash that traps solvent under skin.
- High humidity (above 70% RH). Blushing on lacquer systems, slower flash on waterborne, fisheye risk from moisture in air supply.
- Low humidity (below 30% RH). Faster flash, more dry-spray risk, static buildup on plastic substrates.
The booth conditions in the question are often the diagnostic clue. If the question describes a hot booth, mottling and dry spray are top candidates. If it describes a cold booth, orange peel and runs are top candidates.
Building the Pre-Test Drill
A targeted 7-day drill for the defect content specifically:
Day 1: Build the defect flashcard deck (12 to 15 defects with cause and cure on the back).
Day 2: Run the deck both directions until you can name each pairing in under 5 seconds.
Day 3: Take a 30-question simulator drill in the Application Problems category. Review every miss.
Day 4: Take a 30-question simulator drill in the Finish Defects category. Review every miss.
Day 5: Take a mixed 30-question drill (Application + Finish Defects combined). Review every miss.
Day 6: Take a full 65-question ASE B2 simulator. Confirm your Application Problems and Finish Defects categories are above 85%.
Day 7: Light flashcard review. Sleep, eat, show up rested.
Common Cross-Defect Confusion Patterns
Some defects share visual similarities and the test takes advantage of that. Train yourself to distinguish them.
Fisheyes vs. Solvent Pop (Wet):
Both create small circular features in the wet film. Fisheyes are smooth-edged craters where the paint avoided a contaminant; solvent pop has rough-edged or burst-edge holes where solvent boiled out from underneath. The cause descriptions are the test's tell.
Orange Peel vs. Dry Spray:
Both create texture. Orange peel is a uniform, flowed-out texture from atomization or flow-out issues. Dry spray is a loose, powdery texture from particles drying mid-air. If the question mentions powdery or rough surface, lean dry spray. If it mentions uniform but not smooth, lean orange peel.
Solvent Pop (Wet) vs. Solvent Pop (Post-Cure):
Same root cause, different timing. Wet-stage solvent pop appears during spraying or within minutes; post-cure solvent pop appears hours later after the surface looked fine. Both fixes are the same: longer flash, slower reducer, full cure before force-dry.
Die-back vs. Color Match Drift:
Both involve a finish that looked right initially but changed. Die-back is gloss loss; color match drift is color change. Different causes, different fixes.
Adhesion Failure vs. Wrinkling/Lifting:
Both involve paint coming off the substrate. Adhesion failure is gradual peeling from poor prep; wrinkling/lifting is immediate or near-immediate from solvent attacking the previous layer.
Build flashcards specifically for these confusing pairs and practice distinguishing them.
Production Painter Reality
For working painters reading this: most production shops have ONE defect they see repeatedly (often mottling on metallics or orange peel on clear). Identify your shop's recurring defect and study its full cause-and-cure pattern.
Your shop experience with that defect is real knowledge. The ASE B2 will reward you for the depth on your most-common defect. For the others (which you may have only seen rarely), the cheat sheet above is your study foundation.
Combine shop experience with structured study and the defect categories become consistent point sources rather than gambling.
Defect Prevention as a Career Skill
Beyond passing the ASE B2, defect knowledge pays off every job you spray. The painter who consistently produces defect-free finishes is the painter who commands the highest pay tier and gets the most demanding repaints and custom work.
Most defects are preventable with technique. Train yourself to:
- Verify booth conditions before every spray session (temperature, humidity, airflow).
- Match reducer to booth temperature on every job, not by habit.
- Set the spray gun pressure at the cap, not at the wall regulator.
- Honor manufacturer-specified flash times, not shop-shortcut times.
- Inspect the panel under proper lighting after each coat.
- Address the cause of any defect, not just the symptom.
These habits compound over a career. The painter who develops them earns the right to charge premium for paint work.
The Final Word on Defects
The 12 defects covered above account for the vast majority of refinishing failures on both the ASE B2 and in real-world production work. Memorize the cause-and-cure pairings, drill the test format, and the defect content area becomes one of the most reliable point sources on the exam.
Pass the defect questions and you've climbed a meaningful slope on the ASE B2 overall.
Choose Your ASE B2 Access
One-time payment. No subscriptions and no recurring fees, ever.
- Prometric-style exam simulator
- 1000+ practice questions
- Digital flashcards
- Weakness drills
- Web or mobile access
- Everything in Simulator Access
- Full ASE Academy lesson course
- Step-by-step guided study path
- Hands-on labs and key-term training
The Simulator and the Simulator + ASE Academy bundle are both available now. All sales are final.


Discussion
Join the discussion — sign in to comment.
Comments are reserved for registered students and technicians. Your name will be pulled from your profile automatically.
Log In Register