
The Question That Trips Up Almost Every Apprentice
After you finish metalwork on a panel and the bare steel is exposed, what goes on next? Body filler directly to the metal, or epoxy primer first?
I've watched this question divide shops, instructors, and apprentices for years. Some old-school techs swear filler goes directly on bare steel. Modern training and ASE-aligned procedures say epoxy primer first. The ASE B2 and ASE B3 both test this concept, and the test-correct answer is consistent.
This article walks through the procedure, the why behind it, the trap-question patterns, and the specific products and sequences that pass the test.
The Short Answer
Epoxy primer first. Then body filler. Then sealer. Then color and clear.
The modern ASE-aligned procedure for a bare-steel area after metalwork is:
- Clean the bare steel thoroughly (wax-and-grease remover, then a metal cleaner if any oxidation is present).
- Apply an epoxy primer to the bare steel, allowing it to flash per the manufacturer's TDS.
- Apply polyester body filler over the cured epoxy primer.
- Sand the filler smooth with the proper grit progression.
- Apply a primer-surfacer over the filler for build and sanding.
- Apply sealer.
- Apply basecoat.
- Apply clearcoat.
The reason for epoxy primer before filler: corrosion protection AND superior adhesion of the filler to the panel.
Why "Filler Directly on Bare Steel" Is Wrong
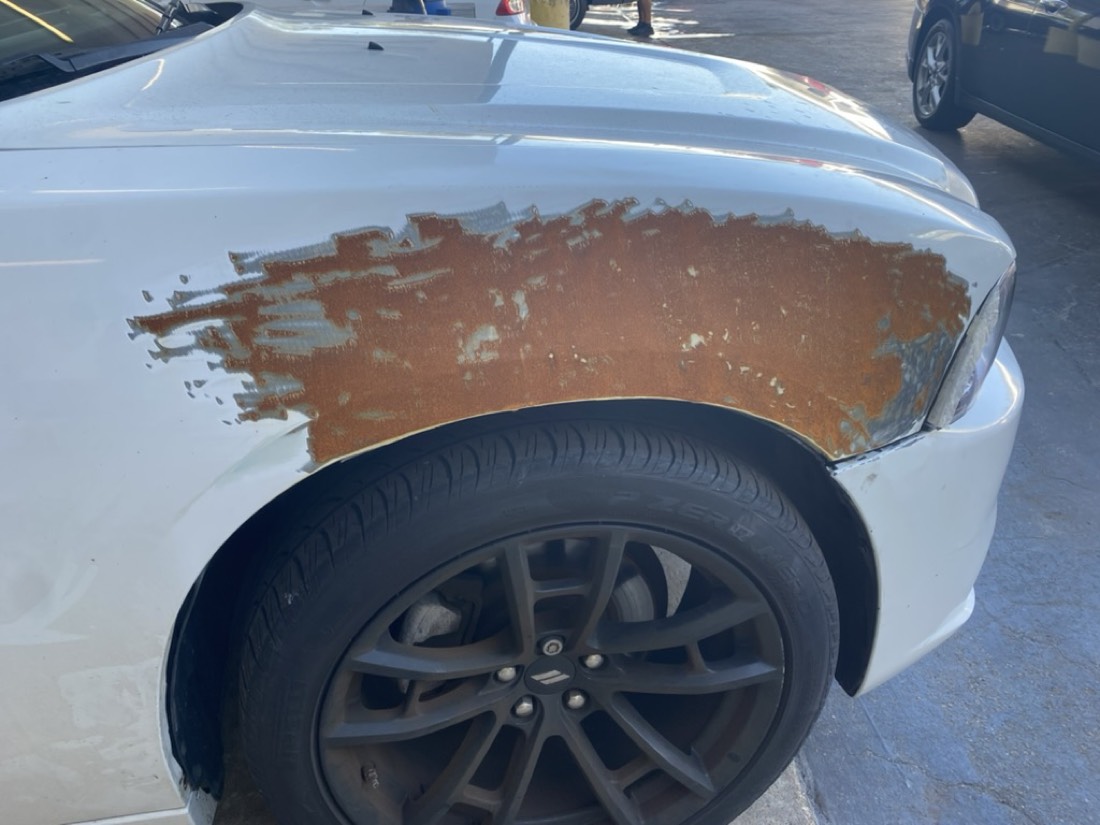
The old-school argument for putting filler directly on bare steel was that polyester filler "bonds better" to mechanical scratches in the metal. That argument made sense when filler chemistry was less developed and primer chemistry was less developed.
It's no longer accurate, and the ASE B2 and ASE B3 reflect the modern understanding.
Three reasons filler-on-bare-steel is wrong:
-
Corrosion protection. Bare steel exposed to moisture in the air starts oxidizing immediately. Polyester filler is hygroscopic; it absorbs moisture from the air over time. Filler on bare steel traps a thin layer of moisture between the filler and the panel. Over months and years, that moisture promotes rust under the filler, which expands and lifts the filler, and the customer sees blistered or peeling paint.
-
Adhesion failure paths. Modern epoxy primers are formulated to bond to bare steel with significantly higher pull-off strength than polyester filler does. By applying epoxy first, the bond chain becomes steel → epoxy → filler, with each bond optimized for the materials it joins. Filler-on-steel has a weaker initial bond and more failure points.
-
OEM and product TDS alignment. Most modern OEM repair procedures and most modern filler manufacturer TDS documents specify epoxy primer before filler. The ASE B2 and B3 test against current published procedures, not against shop tradition.
What Epoxy Primer Actually Does
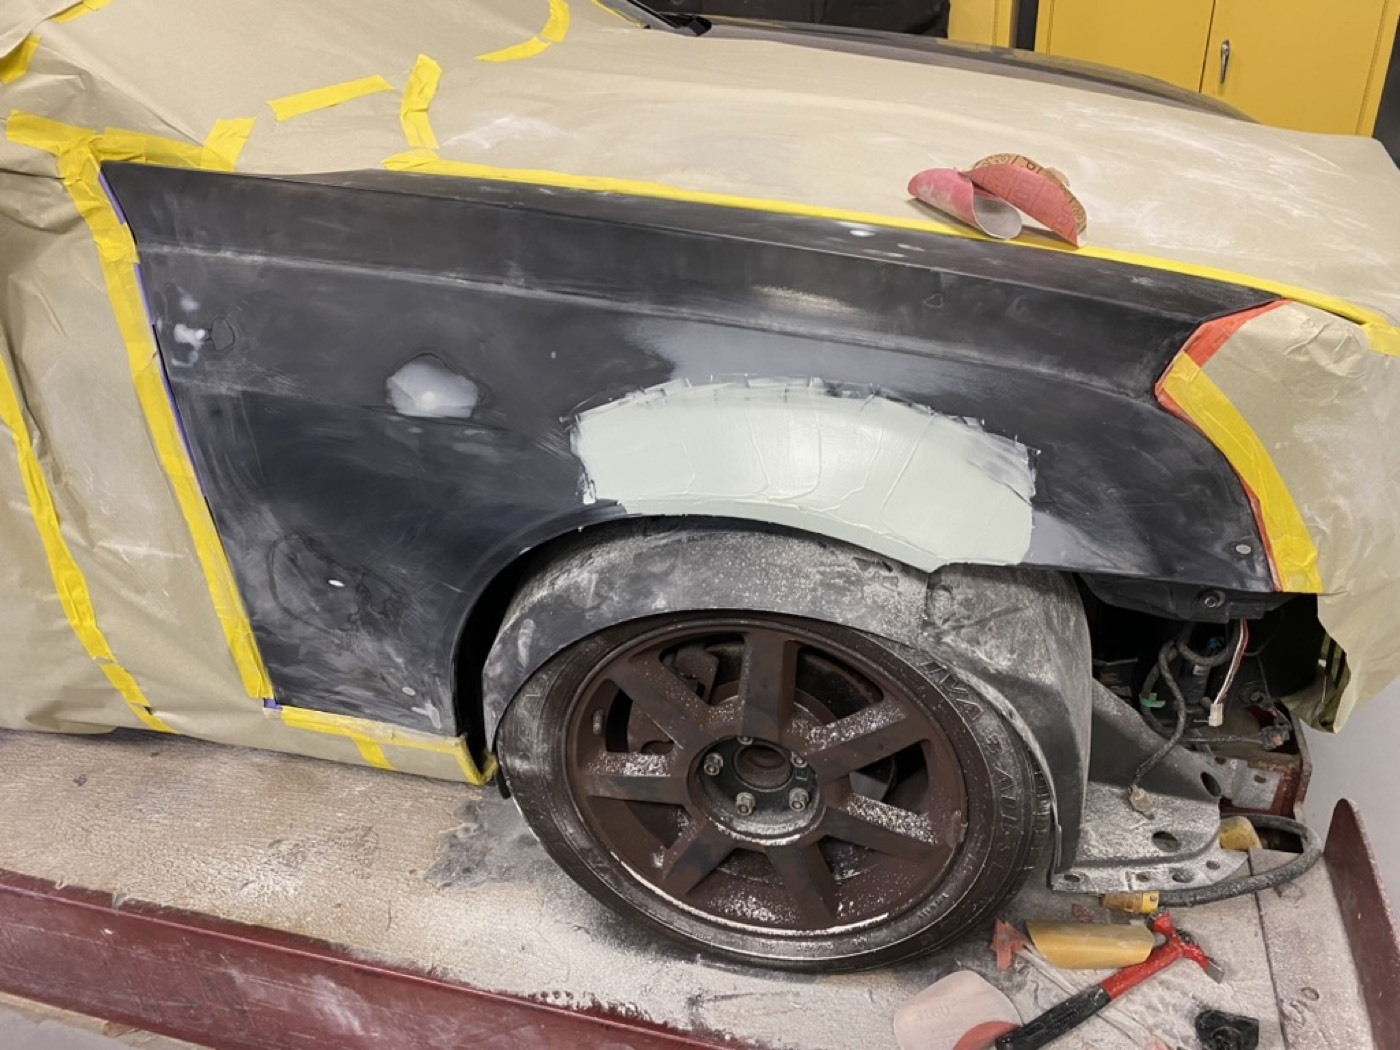
Understanding what epoxy primer brings to the joint helps you remember why the sequence is what it is.
- Corrosion protection. Two-component epoxy primer seals bare metal from moisture and oxygen. Properly applied, it provides long-term corrosion resistance even if the panel is later damaged through the topcoat layers.
- Adhesion bridge. Epoxy bonds aggressively to bare metal, including aluminum (with the correct etch primer in the system for some aluminum applications), galvanized steel, and traditional cold-rolled steel. It also provides a high-adhesion surface for polyester filler, urethane primer-surfacer, and direct-to-metal topcoats.
- Chemical barrier. Epoxy resists chemical attack from solvents, fuels, and many cleaning agents that would damage bare metal or compromise filler bond.
- Flexibility. Epoxy has more flexibility than older single-component primers, which means it tolerates panel flex without cracking.
The "modern primer sandwich" that ASE expects: bare metal → epoxy primer (corrosion barrier and bond) → polyester filler (shaping) → urethane primer-surfacer (build and finish prep) → sealer → topcoat.
The Proper Sequence in Detail
A step-by-step walkthrough of the procedure-correct sequence.
Step 1: Metalwork to Within 1/16 Inch
Hammer-and-dolly the panel until the highest spots are no more than 1/16 inch above the desired contour. Polyester filler is a finishing material, not a structural one. Excess filler buildup causes cracking, adhesion failure, and the long-term loss of repair integrity.
Step 2: Clean the Bare Steel
- Soap-and-water wash if any contaminants are present from prior work.
- Wax-and-grease remover after any sanding to remove residual oils.
- If oxidation is visible, use a metal cleaner / etch wash per the product TDS.
- Allow full evaporation before primer.
Step 3: Apply Epoxy Primer
- Mix the epoxy per the manufacturer's TDS ratio.
- Apply a uniform coat at the spec'd film build (typically 1 to 2 mils).
- Allow the recoat window flash per the TDS (typically 30 to 90 minutes depending on product and temperature).
- Some epoxies require sanding before topcoat; others are designed to topcoat within a window without sanding. Read the TDS.
Step 4: Apply Polyester Body Filler
- Catalyze the filler per the TDS (typically 2% cream hardener by volume).
- Apply within the epoxy's recoat window if specified.
- Don't exceed the maximum filler thickness (typically 1/8 inch).
- Sand initial filler with 36 to 80 grit, refine with 80 to 180, finish with 180 to 320.
Step 5: Primer-Surfacer
- Apply urethane primer-surfacer over the sanded filler.
- Build is typically 3 to 6 mils.
- Sand with 320 to 400 grit to final smoothness.
Step 6: Sealer
- Apply sealer at the manufacturer-specified film build.
- Some sealers are wet-on-wet for basecoat; others require flash before basecoat.
Step 7 and 8: Basecoat and Clearcoat
- Apply basecoat per the painter's standard procedure (color match, metallic orientation, three-stage if applicable).
- Apply clearcoat per the manufacturer's TDS.
How the ASE B2 and B3 Test This
Both tests touch this material. The ASE B3 covers the body-side procedure (metalwork plus filler plus prep for paint). The ASE B2 covers the paint-side procedure (sealer, basecoat, clearcoat over properly prepared substrate).
Common test patterns:
Pattern 1: Direct identification of the wrong sequence
A technician finishes metalwork on a fender, sands the bare steel with 80 grit, and immediately applies 1/4 inch of polyester filler. The next problem to occur will most likely be:
Pattern 2: Technician A / Technician B
Two technicians are discussing bare steel restoration. Technician A says polyester body filler should be applied directly to bare steel for the best bond. Technician B says epoxy primer should be applied to bare steel before body filler for corrosion protection and adhesion. Who is correct?
Pattern 3: Cause-and-cure on a long-term failure
A customer returns a vehicle 18 months after repair with blistering and peeling paint along a panel that was previously restored. The most likely cause is:
Shop Habits vs Test Answers
The trap pattern is consistent: shop shortcuts on the substrate-prep side are wrong on both tests.
| ❌ Shop Habit | ✅ Test-Correct Answer |
|---|---|
| "Filler goes directly on bare steel." | Epoxy primer first for corrosion protection and adhesion. |
| "More filler covers any imperfection." | Maximum 1/8 inch filler. Metalwork to within 1/16 inch first. |
| "80 grit before primer is fine." | 320 to 400 grit before sealer for solvent-based systems. |
| "Skip the cleaner before primer." | Wax-and-grease remover after sanding, before any primer. |
| "Filler bonds to metal scratches better." | Modern epoxy primer has stronger bond to bare steel than filler does. |
| "5% hardener for faster cure." | 2% cream hardener per TDS. Excess causes pinholes and brittleness. |
When Filler-on-Bare-Steel Was Acceptable (and Why That's Over)
For full transparency: there was a time, decades ago, when filler-on-bare-steel was the standard procedure. The reasons:
- Early polyester fillers were formulated specifically for steel adhesion without an intermediate primer.
- Early single-component primers had inconsistent adhesion characteristics.
- Corrosion protection on the panel after repair was less emphasized as a long-term consideration.
That era is over. Modern epoxy primers have transformed the substrate-prep procedure, modern OEMs require epoxy primer in their published repair procedures, and modern filler TDS documents specify epoxy primer first. The ASE B2 and B3 reflect the modern standard.
If you trained under an old-school painter who taught you filler-on-steel, your shop experience is not aligned with what the tests reward. The tests reward the modern procedure.
The Aluminum Variation
A side note for techs working with aluminum panels.
Aluminum requires a different substrate prep. Most polyester fillers are NOT compatible with bare aluminum due to galvanic corrosion concerns. The procedure for aluminum:
- Aluminum-specific filler products that are formulated for aluminum compatibility.
- OR an aluminum-compatible epoxy primer or DTM (Direct-to-Metal) primer first, then standard polyester filler over that primer.
The ASE B3 expects you to know that bare aluminum requires different prep than bare steel. The epoxy-first principle applies to both metals, but the specific primer products differ.
Quick Reference Card
The summary that fits on a sticky note for your bench.
- Metalwork to within 1/16 inch.
- Clean: wax-and-grease remover.
- Epoxy primer over bare steel.
- Polyester filler (max 1/8 inch).
- Sand: 36-80, then 80-180, then 180-320.
- Urethane primer-surfacer.
- Sand to 320-400.
- Sealer.
- Basecoat.
- Clearcoat.
Run this sequence on every bare-steel job and you've eliminated 90% of the long-term failure modes that lose customer trust and shop reputation.
Where to Start This Week
If you're studying for the ASE B2 or ASE B3 and the substrate-prep procedure has been hazy in your training, build a flashcard deck of the 10-step sequence above. Run it both directions until you can recite it in under 30 seconds.
This procedure also overlaps the ASE B4 Structural test for any structural panel repair that involves bare-steel exposure. Investing in the procedure pays back across multiple ASE B-Series certifications.
Galvanized and E-Coat Substrate Variations
Most modern vehicles aren't bare steel under the factory paint; they're galvanized steel with an e-coat primer applied at the factory. When you grind down through the factory paint, you encounter the e-coat or galvanized layer before reaching bare steel.
E-coat (electrocoat primer). Factory-applied corrosion protection layer. If you only sand through the topcoat and primer-surfacer but not through the e-coat, you don't need to apply epoxy primer to that area. The e-coat is already a corrosion barrier. Featheredge through the topcoat layers and continue with sealer.
Galvanized layer. If you sand through both topcoat layers AND the e-coat to expose the galvanized steel, the bare galvanized still needs corrosion protection. Apply self-etching primer (specifically formulated for galvanized) or an epoxy primer rated for galvanized substrate. Do NOT use a standard acid-etch primer on galvanized; the acid attacks the zinc layer.
Bare cold-rolled steel. Most fully-stripped panels. Apply epoxy primer as the substrate-prep step.
The ASE B3 and B2 both test these distinctions. The trap-question pattern: a scenario describes a tech using a standard acid-etch primer on a galvanized panel. Wrong. Galvanized requires a galvanized-rated primer.
Aluminum Substrate Variation
Bare aluminum requires its own substrate-prep approach. Aluminum oxidizes rapidly in air; the surface develops a thin aluminum oxide layer within minutes of exposure. This oxide layer interferes with primer bond.
Aluminum prep procedure:
- Clean with aluminum-specific cleaner per the product TDS.
- Apply aluminum-rated DTM (Direct-to-Metal) primer or aluminum-compatible epoxy primer within the cleaner's working window before significant oxide reforms.
- Filler (if needed) over the cured aluminum primer. Use only aluminum-compatible filler products to avoid galvanic corrosion.
- Standard primer-surfacer, sealer, basecoat, clearcoat sequence over the filler.
Galvanic corrosion risk: never use standard steel-rated polyester filler directly on aluminum. The chemistry creates a galvanic cell that promotes corrosion of the aluminum.
The ASE B3 specifically tests aluminum substrate prep and the galvanic corrosion concern.
Product TDS as the Final Authority
Whatever procedure your shop teaches, the manufacturer's TDS for the products you're using is the authoritative source. The TDS specifies:
- Approved substrates for the product.
- Surface preparation requirements.
- Mix ratios and pot life.
- Application parameters (film build, fluid tip, air pressure).
- Recoat window and flash times.
- Cure schedule.
- Compatible topcoats.
The ASE B2 and B3 align with manufacturer TDS guidance more closely than with shop tradition. If you study one set of products' TDS in depth, the procedural patterns transfer to other products because the underlying chemistry is similar across manufacturers.
What Happens If You Do It Wrong
For the working tech reading this who's been doing filler-on-bare-steel for years and wondering if it really matters:
It matters. The failure modes appear on a delay (often 12 to 24 months after the repair) which is why you may not have personally been blamed for them. But the customer sees them. The shop owner pays the warranty repair cost. The insurer notes the repeat repair on the vehicle's claim history. Word spreads in the local market about which shops produce repairs that last vs. ones that don't.
Specific failure modes from filler-on-bare-steel:
- Edge blistering within 12 to 24 months around the perimeter of the repair area.
- Spider-web cracking in the topcoat over the filler area, especially in climates with temperature swings.
- Visible underrust showing through the topcoat as a faint orange or brown discoloration.
- Complete delamination of the paint film over the repair area within 3 to 5 years.
Insurance adjusters and DRP coordinators are increasingly aware of these failure patterns and audit for shop procedure adherence. A shop that consistently produces repairs that fail this way risks losing DRP eligibility.
For your career and your shop's reputation, the epoxy-primer-first procedure isn't optional. It's the standard.
Featheredging Through the Layer Stack
A related procedure that the ASE B2 and B3 both test: how to featheredge through the existing layer stack when you're repairing into an existing painted area.
A factory paint film typically has:
- Top: clearcoat (1 to 2 mils).
- Below that: basecoat (1 to 2 mils).
- Below that: e-coat or sealer (1 to 2 mils).
- Below that: galvanized layer (very thin).
- Below that: bare steel.
The featheredge procedure exposes each layer in a graduated taper so the new repair material has a smooth bond surface for each layer.
- Clearcoat: 80 grit feather.
- Through basecoat: 180 grit feather.
- Through primer-surfacer and sealer: 240 to 320 grit feather.
- To bare steel: 320 grit feather.
- Final smoothing: 400 grit feather around the perimeter.
The taper is typically 1/2 inch per layer, so the entire featheredge zone may extend 2 to 3 inches out from the bare-steel repair area.
The ASE B2 and B3 both test featheredging concepts. The exam will describe a hard step or abrupt transition in the featheredge and ask what's wrong. The answer is "insufficient taper through one or more layers."
Cure Times and Production Pressure
A practical note on epoxy primer cure times that often gets shortened in production shops.
Epoxy primer typically requires a recoat window of 30 to 90 minutes (depending on the product) before topcoat or filler application. Some shops shortcut this by applying filler within 15 minutes. The result: the filler bonds to partially-cured epoxy, which doesn't have full crosslinking yet, and the bond strength suffers.
Honor the recoat window. Use that time to clean up, switch tools, address other panels in the queue. The 30 to 90 minutes isn't lost; it's productive time spent on parallel work while the chemistry catches up.
The ASE B2 and B3 reward TDS-compliant timing. The shop habit answer ("apply filler as soon as the epoxy is dry to the touch") is wrong every time.
A Personal Note on Procedure Discipline
I tell my students at Sheridan Technical: the procedures that feel like overhead are the procedures that protect your reputation and your shop's reputation. Filler-on-bare-steel feels fast in the moment. The customer comeback in 18 months for warranty repair feels slow but is the same job done twice. You pay for the shortcut on the second pass.
The 10-step procedure above takes maybe 30 extra minutes per panel vs the shortcut version. Those 30 minutes prevent the customer comeback that costs hours of warranty labor plus the relationship damage that comes from a customer who feels their car wasn't fixed right the first time.
Procedural discipline is one of the differentiators between a journeyman tech and a Master Tech. The ASE B2 and B3 reward it because the industry has learned the lesson at scale.
Practice the Substrate-Prep Questions
The procedure-correct answers show up on multiple B-Series tests. Drill them in the appropriate module.

Discussion
Join the discussion — sign in to comment.
Comments are reserved for registered students and technicians. Your name will be pulled from your profile automatically.
Log In Register