
You're a Good Body Tech. That's Not Enough for the ASE B3.
I've watched a lot of guys walk into the ASE B3 Non-Structural Analysis & Damage Repair test thinking their bench time will carry them through. Five years pulling dents, smoothing filler, replacing fenders, easy, right?
Then they fail.
The ASE B3 isn't asking "can you do this repair?" It's asking "can you identify the procedure, the limits, and the consequences?" And it's loaded with questions about plastics, adhesives, panel replacement decisions, and corrosion protection, areas most shops skim through every day.
Let's break down what actually shows up on this test, where the trap questions live, and how to study without wasting your nights re-reading textbooks you already half-know.
What the ASE B3 Exam Actually Looks Like
Before you spend an hour memorizing weld wire diameters, know what you're walking into:
- 65 scored questions plus a handful of unscored research questions you can't tell apart from the real ones
- 90 minutes on the clock, about 83 seconds per question
- Passing score: roughly 70% (ASE doesn't publish the exact cutoff, it floats based on question difficulty)
- Delivered at Prometric testing centers on a locked-down computer. No phone, no notes, no scratch paper unless they hand it to you
- Four answer choices per question, single best answer. No "select all that apply"
- Five question formats you must recognize on sight: standard, Technician A / Technician B, EXCEPT, MOST likely, LEAST likely
- Results are immediate, PASS or FAIL the moment you click Finish
That 83-seconds-per-question math is generous compared to other tests. The mistake guys make is burning that buffer on the wrong questions. If you have to think hard about a plug-weld diameter, flag it and move on. The questions you know cold are how you bank time for the killers.
The Six Content Areas (And Where the Test Actually Lives)
ASE breaks the ASE B3 into six content areas with roughly this weighting:
| Content Area | Approx. % | ~ Questions |
|---|---|---|
| Preparation (damage analysis, setup, documentation) | 11% | 7 |
| Outer Body Panel Repairs, Replacements, & Adjustments | 28% | 18 |
| Metal Finishing & Body Filling | 14% | 9 |
| Movable Glass & Hardware | 8% | 5 |
| Welding, Cutting, & Joining | 18% | 12 |
| Plastics & Adhesives | 21% | 14 |
Notice what's hiding in plain sight: plastics & adhesives is the second-largest section. If you've been ignoring it because "we just bolt new fenders on," you're walking into a wall. Combine that with welding settings and outer panel decisions and you've got 67% of the test sitting on three content areas. That's where your study hours belong.
Content Area 1: Preparation (7 questions)
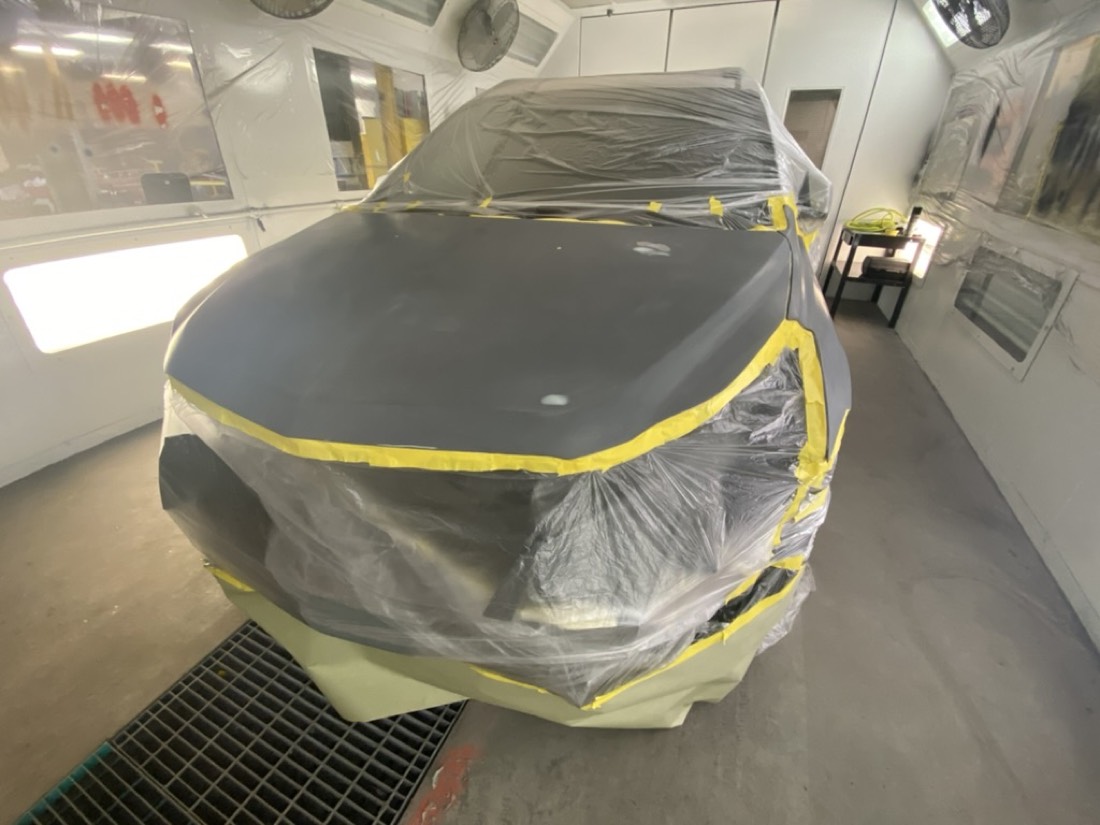
The "easy" 7, and the ones most guys lose because they're reading the question half asleep before they get to the welding section.
What you need to own cold:
- Pre-repair scan. Every collision repair on a vehicle with airbags, ADAS, or any electronic module starts and ends with a diagnostic scan. The ASE B3 will offer "we don't need to scan, no warning lights are on" as a tempting wrong answer. Pick the scan every time.
- Damage analysis sequence. Identify direct vs. indirect damage. Indirect damage radiates from the point of impact through structural load paths, buckles in a strut tower from a front-corner hit, for example. Missing indirect damage on the test = missing it in real life = comebacks.
- Documentation. Before pulling a single fastener, document with photos and a written damage report. The test will offer "start disassembly to find more damage" as a fast answer. Wrong. Documentation always comes first.
- OEM repair procedure access. The textbook-proper answer to "where do you find the repair procedure" is always the OEM service manual (or its licensed equivalent like ALLDATA or OEM1Stop), not experience or a friend at another shop.
- Vehicle setup. Battery disconnection sequence (negative first, positive second when removing, reverse when reinstalling), key fob storage outside the vehicle for some makes, fuel line depressurization before any fuel-system work.
The ASE B3 trap here: "the previous tech already did the scan a week ago." Wrong. You re-scan immediately before AND after repair to capture any new codes that surfaced during the repair process.
Content Area 2: Outer Body Panels, Repairs, Replacements, & Adjustments (18 questions)
The biggest section. The trick: questions are rarely "how do you pull this dent." They're "should you pull this dent, or replace the panel, and why?"
What you need to own cold:
- Section vs. replace decision-making. Many late-model unibody vehicles have specific factory sectioning locations on quarter panels, rockers, and aprons. The ASE B3 will reference an OEM repair manual. The answer is always "follow the OEM-specified location", never "section where it's convenient."
- High-strength steel limitations. UHSS (ultra-high-strength steel), DP (dual-phase), and boron steel cannot be straightened with heat above a manufacturer-specified threshold (typically 1100°F for boron, 700°F for most UHSS). If a question says "Tech A applies heat to a boron pillar to remove a kink", Tech A is wrong, every time.
- Aluminum repair isolation. Aluminum dust contaminates steel work and causes galvanic corrosion. Test answers always favor a dedicated aluminum bay, separate tools, separate dust collection. "We just sweep up after" is never the right answer.
- Bolt-on panel adjustment sequence. Fender adjustments work from inside to outside (rocker line first, then cowl, then hood gap last). Door adjustments work hinges first, then striker. Reverse those orders on the test = wrong.
- Corrosion protection. Bare metal exposed during the repair must be primed with the proper epoxy or self-etch primer before sealer or topcoat. Inside seams need cavity wax. The test loves the question "what restores corrosion protection to a sectioned panel", the answer involves multiple layers (epoxy primer, seam sealer, weld-through primer for the joint itself, cavity wax for enclosed areas).
- R&I vs. R&R. Remove and Install (R&I) means you take it off and put the same part back. Remove and Replace (R&R) means new part. The ASE B3 will use these acronyms and expect you to know the difference and the billing/labor implications.
Pattern to memorize: every outer-panel question that mentions an OEM procedure has the same right answer, follow the OEM procedure. Every question that mentions "shop preference" or "industry standard" without an OEM reference is testing whether you'd guess. Don't guess, there's almost always an answer choice that says "consult the OEM service manual" or its equivalent.
Content Area 3: Metal Finishing & Body Filling (9 questions)
Filler questions get specific. Memorize these numbers cold:
- Maximum filler thickness. Most polyester filler manufacturers cap at 1/8 inch before the filler must be reinforced or the panel must be metalworked closer to true. The ASE B3 may say "the tech applies 1/4 inch of filler and sands it smooth." Wrong, exceeds limit.
- Catalyzation ratio. Typically 2% cream hardener by volume for polyester filler (manufacturer can spec slightly different). Over-catalyzing causes pinholes and brittleness. Under-catalyzing means it never fully cures.
- Featheredging grits. Initial filler shaping: 36 to 80 grit. Refining: 80 → 180. Final scratch before primer-surfacer: 180 → 320. The pre-sealer scuff: 320 to 400. Don't confuse this with paint prep grits, those are finer.
- Metal finishing depth. A properly hammered-and-dollied panel should be high-spots no more than 1/16 inch above the desired contour before filler is applied. Filler is a finishing material, not a structural one.
- Heat history. If a panel was heated repeatedly to straighten, the filler bonding properties change because the metal's surface oxide layer is altered. The ASE B3 loves this scenario, "the panel was heated three times before filler was applied" → expect adhesion failure.
The textbook answer always sides with proper metalwork first, minimum filler second. "Just fill it with bondo" is never on the answer key.
Content Area 4: Movable Glass & Hardware (5 questions)
Five questions. Easy points if you don't sleep through them. Topics:
- Window regulator types, cable, scissor, sash. Know which type goes in which door.
- Door hinge adjustment sequence. Hinges first (for panel alignment), then striker (for latch engagement). Adjust striker first and the door won't close properly even after hinge adjustment.
- Glass urethane installation. Minimum bead height (typically 3/8 to 1/2 inch triangular bead), surface prep (clean with isopropyl alcohol or manufacturer-recommended cleaner, not glass cleaner with ammonia), and primer requirements on bare metal pinch welds and on the glass itself.
- Safe drive-away time (SDAT). Varies by adhesive, typically 1 hour to several hours depending on humidity and temperature. The ASE B3 trap: a tech tells the customer "you can leave in 10 minutes." Wrong. SDAT is always longer than the customer wants it to be and never less than the adhesive manufacturer specifies.
- Glass full-cut vs. short-cut. Full-cut removes all old urethane to bare metal, required when corrosion is present. Short-cut leaves a thin layer of old urethane as a fresh substrate, acceptable when bonding to existing cured urethane.
Content Area 5: Welding, Cutting, & Joining (12 questions)
GMAW (MIG) questions dominate, but be ready for STRSW (squeeze-type resistance spot welding) and a handful of cutting/joining items.
MIG fundamentals:
- Wire diameter for material thickness, typically .023 inch for HSS sheet up to ~20 gauge.030 to .035 inch for thicker structural panels.
- Shielding gas mixes, 75/25 Argon/CO2 is the standard for body steel and gives the cleanest weld with minimal spatter. Pure CO2 is for thicker plates and deeper penetration. Pure Argon is for aluminum (with a different process, spray transfer, not short-circuit).
- Plug welds vs. continuous welds. Most exterior replacement panels call for plug welds at the original spot weld locations. Continuous welds where specified by OEM, typically inner-structure joints, not exterior skin. Wrong choice = excessive heat warpage.
- Plug weld hole size. Typically 5/16 inch (8 mm) for most steel body panels. Smaller holes don't get full penetration; larger holes warp the panel.
- Welder setup. Voltage controls arc length and bead profile. Wire speed controls deposition rate. Heat input is the product of both. Too hot = burn-through and warpage. Too cold = poor fusion and cold lap.
STRSW (squeeze-type resistance spot welding):
Increasingly favored by OEMs because it controls heat better than MIG on HSS and DP steel. The ASE B3 expects you to know:
- It's a one-side or two-side electrode process that pinches two metal sheets together and runs current through to create a fusion nugget.
- OEM repair manuals increasingly specify STRSW with weld-bonded adhesive as the required joining method on UHSS and DP panels.
- A test question will describe a tech using MIG plug welds on a panel that the OEM specifies STRSW. Tech is wrong, every time.
Cutting:
- Plasma is preferred for clean cuts on thin steel. Abrasive cut-off wheels are for fast roughing. Reciprocating saws have their place but throw a lot of sparks and metal, bad choice near upholstery, wiring, or fuel systems.
- Always identify the cut location relative to OEM-specified factory seam locations. Cutting in the wrong location can compromise structural integrity even on a "non-structural" repair if you cut into a load path.
The diagnostic shortcut: every welding question reduces to what does the OEM procedure specify, and does the answer match it? If a tech is using shop preference instead of OEM specs, that tech is wrong.
Content Area 6: Plastics & Adhesives (14 questions)
This is where the most preventable failures happen. ASE wants specifics, own them cold.
Plastic identification. The ASE B3 will hand you scenarios with ISO codes. Memorize:
- TPO (Thermoplastic Olefin), modern bumper covers. Repairable with adhesive or two-sided welding. Requires flame treatment or adhesion promoter before primer.
- PP (Polypropylene), often blended (PP/EPDM), most fascia covers. Repair similar to TPO.
- PUR (Polyurethane), older, denser bumper covers. Adhesive repair works well, paints easily without adhesion promoter.
- PC (Polycarbonate), rigid, used in headlamp housings, some grilles. Generally not repairable when cracked, replacement.
- ABS (Acrylonitrile Butadiene Styrene), interior trim, some bumper inner reinforcements.
The ASE B3 will give you the ISO code printed on the part and ask which repair method applies. Match the polymer family to the repair technique.
Repair vs. replacement decision-making:
- Small puncture in a TPO bumper cover → repair with two-sided weld or structural adhesive plus reinforcement.
- Cracked rigid PC headlamp housing → replacement. Not a repairable substrate.
- Tear in a flexible fascia exceeding 50% of the panel length → replacement preferred over repair, since the structural integrity is compromised.
- Damaged plastic with paint that won't strip cleanly → replacement may be the right call to avoid adhesion failure later.
Adhesive cure times and temperatures:
Two-part urethane adhesives have specific cure windows. The ASE B3 will ask what happens if you skip or shortcut the recommended bake cycle. Right answer: bond strength is compromised, premature failure. Cure times are usually specified at 70°F, colder = longer cure, warmer = faster cure but shorter pot life. The "high-heat lamps to speed it up" answer is always wrong unless the manufacturer's TDS explicitly allows it.
Surface preparation:
- Wax-and-grease remover (not soap and water) before adhesion promoter
- Adhesion promoter or flame treatment on polyolefins before primer
- Sanded with the manufacturer-specified grit (typically 80-180 for damaged area, blending out to 320-400 for paint blend)
The ASE B3 Trap: A question describes a tech "speeding up" a urethane adhesive with high heat lamps. The shop answer is "saves time." The test answer is "compromises bond strength and creates premature failure." Always pick the procedure-correct answer, not the shortcut.
The "ASE B3 Trap": Shop Habits vs. Test Answers
Here's the pattern across every content area: ASE rewards the answer your OEM service manual and your product TDS would give. Shop shortcuts are the wrong answer almost every single time.
A handful of pairings to internalize:
| ❌ Shop Habit | ✅ Test-Correct Answer |
|---|---|
| "We don't need to scan, no warning lights are on." | Scan before AND after every collision repair. |
| "Cut and section wherever it's clean." | Follow the OEM-specified sectioning location only. |
| "Heat the boron pillar until it moves." | Boron and UHSS cannot be heat-straightened above the OEM threshold. |
| "MIG-plug-weld it, it's fine." | STRSW is the OEM-specified method on DP and UHSS. |
| "Tell the customer it's ready in 10 minutes." | Safe drive-away time per the urethane manufacturer. |
| "Heat lamp the adhesive to cure faster." | Cure per the published TDS or the bond fails. |
| "We always use 35-cent welding wire." | Match wire diameter to material thickness per spec. |
| "Just feather with 220 and prime." | Refine to 320 before sealer. |
The pattern is always the same. OEM procedure, product TDS, OSHA, those are the right answers. Speed, intuition, and "we always do it this way" are wrong.
A 30-Day ASE B3 Study Plan That Actually Works
Reading the I-CAR repair textbook cover-to-cover is overkill and inefficient. Here's the schedule I tell my students to follow:
Days 1-5: Map the territory. Take a full 65-question diagnostic across all six content areas. Note your weakest area by percentage. Most guys come out weak on plastics & adhesives or on OEM-procedure questions in panels & welding, that's where your study hours belong.
Days 6-15: Drill the heavy hitters. Outer body panels (28%), plastics & adhesives (21%), and welding (18%) are 67% of the test. Pound through 50-question drills on each, every other day, until your accuracy is above 85% on all three.
Days 16-22: ISO codes & adhesive cure flashcards. Make a deck (or use our Key Terms tool) where the front is the polymer ISO code (TPO, PP/EPDM, PUR, PC, ABS) and the back is the repair method + adhesion-prep requirement. Same drill for adhesive products, front is product type, back is cure time + temperature window.
Days 23-26: Mixed-mode mastery. Take three full 65-question simulated exams under timed conditions. No looking up answers mid-test. Review every miss the next day and write down the OEM-procedure rule the question was testing.
Days 27-29: Preparation, glass, and finishing. Block out one study session on each. These are the smaller categories, easy points if you take them seriously, easy losses if you skip them.
Day 30: Light review + rest. Skim your flashcards, get sleep, eat breakfast. The body tech who shows up rested beats the one who crammed all night every single time.
Day-of-Exam Tactics
You earned the prep. Don't blow it at Prometric with bad test-taking:
- Arrive 30 minutes early. Late = automatic forfeit. Bring your ASE registration confirmation and a photo ID.
- Pace yourself. 83 seconds per question. If you're past 2 minutes on one, flag it and move on. Come back at the end.
- Use the elimination method. Two wrong answers are usually obvious. Of the remaining two, pick the one that matches the OEM procedure or the TDS, not the shop shortcut.
- Watch for "EXCEPT" and "LEAST LIKELY" wording. ASE flips the question on you. "All of the following are correct procedures EXCEPT..." If you skim, you'll pick a correct procedure and get the question wrong.
- Technician A / Technician B questions. A says X. B says Y. Question: who is correct? Possible answers: A only, B only, both, neither. Read both statements carefully and evaluate each one independently. The "both" and "neither" answers exist for a reason, they catch guys who only read Tech A.
- Don't second-guess. Your first instinct is usually right if you studied. Change an answer only if a later question reminded you of a fact you'd forgotten.
This Is What You're Working Toward
ASE Certified
Non-Structural Analysis & Damage Repair Technician
The official patch awarded when you pass the ASE B3. Recognized by every shop owner and DRP that values OEM-procedure discipline.
ASE®, the ASE logo, and "ASE Certified" are registered trademarks of the National Institute for Automotive Service Excellence. asecollisiontestprep.com is not affiliated with, endorsed by, or sponsored by ASE.
Stop Guessing. Start Passing.
You don't have time to fail this test and pay the retake fee. You're a body tech, you need the ASE Certified Non-Structural Technician patch to bump your flat rate, move into a lead role, or qualify for ASE Master Collision Repair & Refinish status.
At asecollisiontestprep.com, we've stripped away the fluff. We don't give you a 600-page repair textbook; we give you the patterns and procedures you need to pass.
- Unlimited practice attempts. Drill the ASE B3 questions until you can spot the trap answers in your sleep.
- Real ASE-style questions across all six content areas, with the same five question formats (standard, Technician A/B, EXCEPT, MOST likely, LEAST likely) you'll see at Prometric.
- Category-by-category breakdown after every test so you know exactly which content area needs more work.
- Key terms flashcards, certification-style 65-question exams, and a Prometric-style simulator so the real test feels like a Tuesday.
- Transparent pricing. $99 for 30 days of full ASE B3 access, long enough to prep and pass.
PRO-TIP: Every ASE B3 question that mentions an OEM repair procedure has the same right answer, follow the OEM procedure. When in doubt between the shop habit and the OEM spec, pick the OEM spec. It's the right answer 95% of the time.
Pass the ASE B3 the first time. Don't pay the retake fee twice.
Choose Your ASE B3 Access
One-time payment. No subscriptions and no recurring fees, ever.
- Prometric-style exam simulator
- 1000+ practice questions
- Digital flashcards
- Weakness drills
- Web or mobile access
- Everything in Simulator Access
- Full ASE Academy lesson course
- Step-by-step guided study path
- Hands-on labs and key-term training
The Simulator and the Simulator + ASE Academy bundle are both available now. All sales are final.

Discussion
Join the discussion — sign in to comment.
Comments are reserved for registered students and technicians. Your name will be pulled from your profile automatically.
Log In Register